


Snapping is not a default in Leapfrog, it is optional and when used incorrectly can lead to increases in processing time for minor increases in quality and can also lead to unstable meshes. This blog discusses how you can avoid unnecessary snapping by using your experience and looking first at your modelling parameters to ensure they have the correct relationships.
Model refinement
Maps, drillholes and other geological data are an important source of information for the continuous updating of your model. They help you refine your understanding of the location of faults, mineralization, and lithological units. The question is: how refined does your model need to be? The refinement needs snapping? Very fine resolution? What is the size of your composites? What is your minimum modelling width? And finally, what is the block size of your resource model?
Snapping is a useful tool in the model refinement process, it allows you to place control points in meshes for your sampled data. It forces surfaces to honour the specified contacts, moving triangles so that the surface precisely intersects the contact. However, it is worth remembering that snapping is not always worth it, if it was it would be the default in Leapfrog rather than an option! When it’s not necessary, snapping can lead to increases in processing time and to triangulation errors, where a single point is sharing more than three, four or perhaps six edges, leading to triangulations becoming more and more unstable, with sharp edges and weird artefacts. This does not just increase your processing time it can lead to issues downstream; for example, being unable to generate a domain estimation, or not being able to evaluate a triangulation to a block model.

When a surface is imported, Leapfrog Geo automatically sets a surface resolution based on the information in the file. It is not possible to change the Resolution of Surfaces imported into Leapfrog Geo. The exception is elevation grids (see Importing an Elevation Grid).
When surfaces are created, Leapfrog Geo sets a default resolution based on the data available. You can set a lower value, but calculations will take longer. In addition, the resolution for many surfaces can be adaptive; that is, areas closer to data will have a finer resolution than areas further away from data.

Review your domains basic statistics
The best approach is to apply the reasonableness test to your basic statistics from the resulting domain, take a look at the average grade of your samples versus the average grade of your domain, look at the variance or drilling length versus modelling length, before you decide if snapping or more refinement is necessary. Then look at your results with snapping on and with snapping off. If the increase of quality you are getting from snapping is small – for example less than 1% – and you are still getting 99% accuracy of drilling length versus modelling length, do not snap.
Resolution
Let us look at resolution, to help understand this concept.
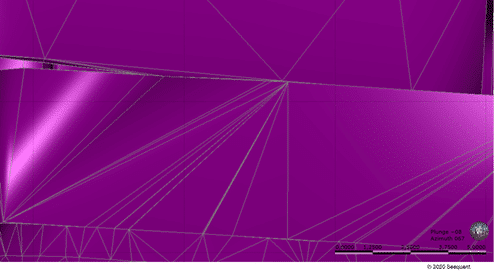
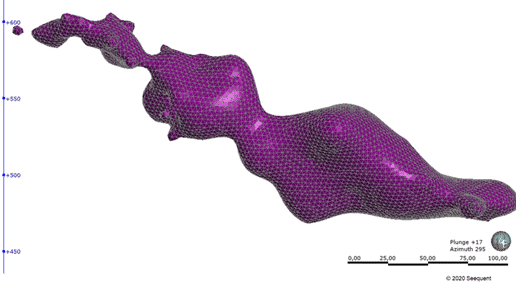
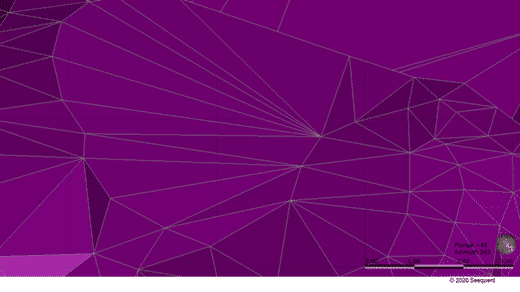
In Leapfrog Geo, meshes are used to represent surfaces and solids in the form of vertices and triangles that define a 3D shape. The resolution of a surface is controlled by the size of the triangles used to create the surface. A lower surface resolution value means smaller triangles and, therefore, a finer resolution. A higher surface resolution value will take less time to process but the surface may not show the level of detail/refinement required.
Bringing in new data and deciding whether to snap or to reduce resolution
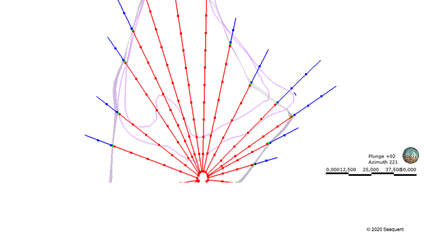
So, we have imported our new data. Unticking the snap box means that points are used as a guide for the Surface but are not snapped to exactly.
Advanced surface editing tips
Now we are going to apply some advanced surface editing to help improve accuracy in your modelling and determine if snapping is needed or not. All the parameters we refer to will be considered before we start modelling to ensure that their relationships are correct and that they work collectively for better results and acceptable processing times.
- Sample size – Look at the size of our samples, what is the relationship between the samples and our minimum modelling width? Once you know the minimum modelling width we can decide on Point Generation.
- Minimum modelling width and Point Generation – If 10m is the minimum modelling width, we cannot extract points at every 40m – it does not make sense. So, if 10m is the minimum modelling width we might set a point generation at 5m, for example. Keep in mind, that if our minimum modelling width is X our background for our spacing must be the same or smaller so we can capture those samples.
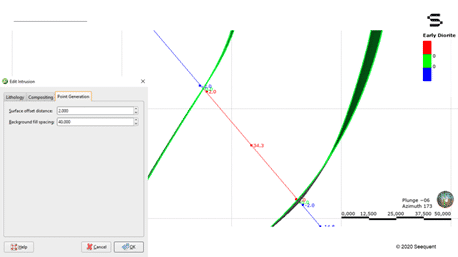
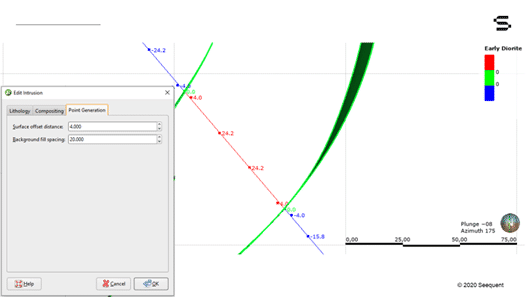
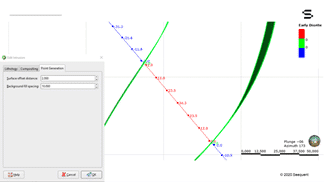
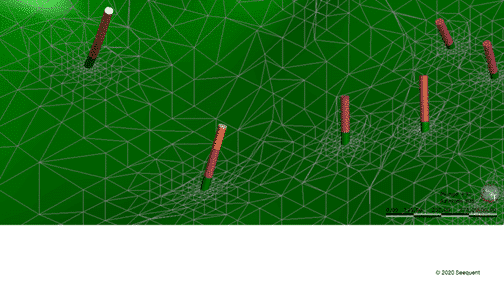
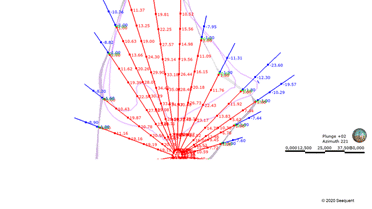
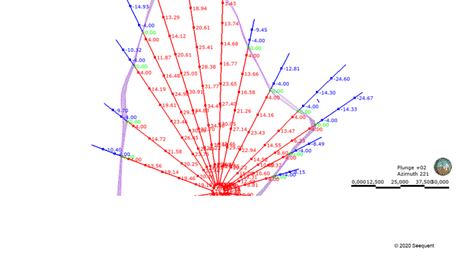
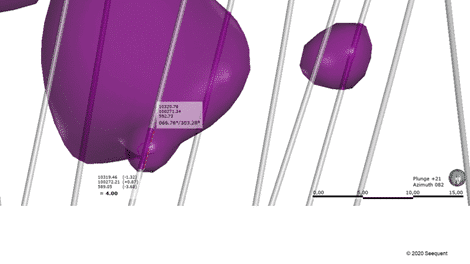
3. Surface Offset Distance – this is the distance between the contact point and the first extracted point. A larger distance allows more obtuse angles, a smaller distance more acute angles, whereby the surface honours the contact point in an orthogonal angle to the angle of the drillhole.
In the example, we can see there is a Green point (contact point or “0”), a Red (inside point, represented by a positive distance value), and a Blue (outside point, represented by a negative distance value) and they have quite a distance between them, consequently the Surface has quite a wide angle of approach to the drillhole. If we make the Surface Offset Distance small, the Surface will only be able to approach the drillhole in an orthogonal fashion, because those two points are going to be very close to each other. If we use a Surface Offset Distance that is really large the Surface would have enough space to intercept the drillhole almost in a parallel fashion if it needs to. Consider if our drillholes have multiple directions, then the Surface will have to approach the drillholes in many different angles. We will need our Surface Offset Distance to be bigger, maybe two times the background for our spacing or three times or four times. Alternatively, if our drillholes are all orthogonal to the direction of our modelling then the Surface Offset Distance can be smaller.

4. Resolution and Block size – We need to make very sure that the resolution we’re using is compatible with the sample size and later with the block size we are going to use in the block model. For instance, it does not make sense to use a resolution of 1m, if later we are going to code this into a block model where the blocks are 10m x 10m. Similarly, we cannot use resolution of 10m if we are trying to model samples of 2m, because the triangle is too big and Leapfrog is not going to see the sample.
5. Modelling compositing – we could also review this parameter. We can set it to the same as the resolution or we could set it to 0, (no minimum modelling width). If Point Generation is 5m, minimum modelling width is 5.
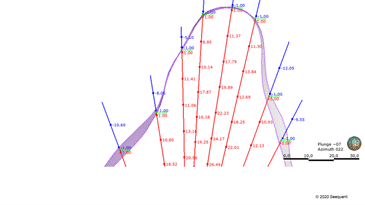
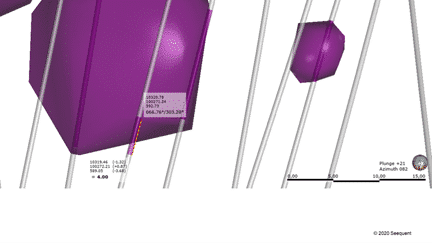
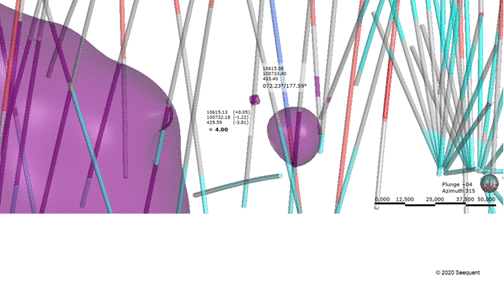
It is looking great! It is making the cross section right there, if you turn it around you can see that it is intercepting it perfectly. This is because we have taken the time to feed in the right parameters and in doing this made sense of the background for our spacing, the Surface Offset Distance, the Resolution. We may not need Snapping.
If we add Snapping by turning it on, you can see that it is almost the same Surface.
So, to recap
Before you start modelling, look at the size of your samples, what is the relationship between the samples and your minimum modelling width? Work through the parameters and ensure that your relationships are correct. Then, once you have the first results of your model you can decide if you should use Snapping, if you should reduce the resolution or the background fill spacing. Parameters, if set up correctly, can significantly decrease your processing time.


When you look at quality vs processing time, you will reach a point where your quality is not going to improve and flattens and yet processing time continues to increase. To find that optimum point you need to look at the parameters we have discussed. Once at this point, Leapfrog is optimised and will create a model that is fit for purpose, with or without Snapping.
If you would like to learn more about Snapping, take a look at these blogs:
In this guide we will show you how to snap (or influence) a surface with mapped points. This example shows how to add points into the hanging-wall (HW) and footwall (FW) of a vein, but the same technique could be used for any surface within Leapfrog.
https://www.seequent.com/updating-a-vein-with-mapping-in-leapfrog-geo/
In this video we will show you how to snap (or influence) a surface with mapped points. This example shows how to add points into the hanging-wall (HW) and footwall (FW) of a vein.