


In Leapfrog we can visualise our designs alongside our geological and subsurface information, but we can go a step further and combine the design and subsurface information to gain better insights of the interaction of the two for improving our understanding of the project.
Technical Tuesdays is a monthly webinar series, presented by our in-house Seequent experts. Our technical specialists will present tips and tricks to help you bring out the best in our software.
In Leapfrog we can visualise our designs alongside our geological and subsurface information, but we can go a step further and combine the design and subsurface information to gain better insights of the interaction of the two for improving our understanding of the project.
In this webinar we will look at how we can take an excavation design surface into Leapfrog and use it alongside a topography surface and geological model to get cut volumes of each geological unit as well as fill volumes.
This workflow is applicable for any open surface mesh brought into Leapfrog that you want to utilise for combining with a model in Leapfrog.
In this webinar we will discuss:
- Merging a design mesh with the current Site topography mesh
- Creating the cut and fill volumes for a design.
- Combining the Cut of the design with the geological model to identify expected excavation volumes by material.
Overview
Speakers
Aaron Hollingsworth
Customer Solutions Specialist- Seequent
Duration
17 min
See more on demand videos
VideosFind out more about Seequent's civil solution
Learn moreVideo Transcript
[00:00:03.290]
<v Instructor>Hello everyone, and welcome</v>
[00:00:04.650]
to today’s technical Tuesday on creating cut
[00:00:07.560]
and fill volumes in Leapfrog.
[00:00:10.300]
My name is Aaron Hollingsworth,
[00:00:11.970]
and I’m a Customer Solution Specialist here
[00:00:14.300]
at Seequent Australia.
[00:00:19.210]
In today’s webinar, we are looking at a very specific
[00:00:22.390]
but very commonly used and requested workflow.
[00:00:26.280]
And that is for generating cut and fill volumes
[00:00:28.690]
from an excavation surface in Leapfrog.
[00:00:31.950]
To achieve this, we will first look
[00:00:33.770]
at merging our excavation surface
[00:00:35.980]
with our topography surface, then using that
[00:00:39.970]
to create a model to generate a fill volume
[00:00:43.560]
and a cut volume.
[00:00:45.430]
We’ll then take that cut volume from our model
[00:00:48.370]
and combine it with our existing geological model
[00:00:50.930]
to get the specific cut volumes for each
[00:00:53.950]
of our geological units.
[00:00:57.960]
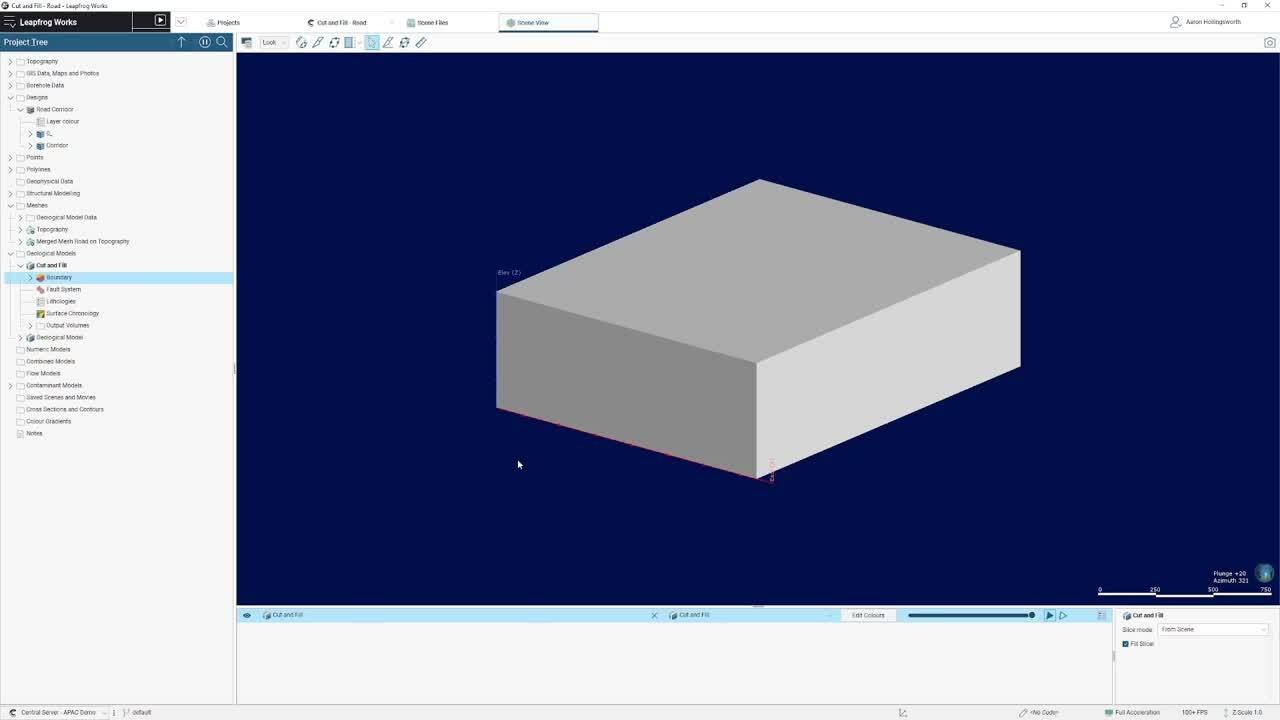
We are now in Leapfrog and in our project that we’re using
[00:01:01.930]
for our cut and fill volume example here.
[00:01:06.230]
In our 3D scene, we can see our existing geological model
[00:01:09.960]
that we’ve already created for this project.
[00:01:14.550]
For the cut and fill, we’re basing this off a road design
[00:01:18.180]
in this example.
[00:01:20.350]
If I go to my design folder in my project tree
[00:01:22.610]
and bring in that road design,
[00:01:24.150]
we can see it against our geological model here.
[00:01:27.570]
The areas we can see above the topography
[00:01:30.680]
and above our geological model are the areas
[00:01:32.680]
of fill that we’re going to be generating.
[00:01:35.260]
If I make my geological model transparent here,
[00:01:37.750]
we can see the rest of this road design underneath
[00:01:41.030]
the model and these are the areas we’ll be
[00:01:42.530]
generating cut for.
[00:01:49.920]
The next step to get our cut and fill volumes will be
[00:01:54.690]
to generate a model where we can get the volumes
[00:01:57.790]
of cut and fill.
[00:02:00.520]
We can then take the cut volume from this model
[00:02:03.190]
that we’ve created from our excavation design in this case
[00:02:06.500]
our road, and combine that with our geological model
[00:02:09.270]
to get the individual cut volumes for our geological units.
[00:02:17.000]
Now, to use a surface or an existing mesh in a model
[00:02:21.720]
in Leapfrog, it needs to go to the extents
[00:02:23.770]
of the model boundary that we set.
[00:02:27.070]
You’ll notice that for this design,
[00:02:29.550]
it doesn’t currently meet that requirement.
[00:02:32.890]
So what we’re going to do is we’re going to use
[00:02:34.710]
the merge meshes function in Leapfrog
[00:02:37.010]
to generate a mesh from our excavation design here
[00:02:41.020]
that we can then use.
[00:02:46.950]
To create this merged mesh, we’re going to go
[00:02:49.500]
to our meshes folder in our project tree.
[00:02:52.160]
We’re going to right click and select mesh operations,
[00:02:55.480]
merge meshes 2D.
[00:02:58.450]
What the merge meshes function allows us to do
[00:03:00.850]
is take one mesh and merge that with another mesh.
[00:03:07.940]
In this example, what we’re going to do
[00:03:10.290]
is we’re going to set our detailed mesh
[00:03:12.720]
as our excavation design so in this case my road surface.
[00:03:18.640]
And what this means is that wherever we have
[00:03:20.660]
the detailed mesh, that will use that information
[00:03:24.280]
so those elevations with that mesh surface.
[00:03:27.570]
But anywhere we don’t have this,
[00:03:29.150]
we can use a different surface.
[00:03:31.150]
And in this case, I’m going to use my typography surface.
[00:03:35.220]
So wherever we have our core design it will use that,
[00:03:38.350]
but everywhere else across the much larger area,
[00:03:41.220]
we’ll use our topography information.
[00:03:43.700]
And this will allow us to generate a surface
[00:03:45.590]
that we can easily use in our models in Leapfrog.
[00:03:51.600]
We can also set a buffer distance and this is the zone
[00:03:55.410]
where it merges from one mesh to another,
[00:03:59.010]
so where it transitions between the two.
[00:04:02.590]
For now, I’ll leave it as the default as five
[00:04:04.830]
and five for these meshes.
[00:04:06.600]
And I’m just going to name this merge mesh road on topography.
[00:04:14.390]
If I click okay, that will process,
[00:04:18.460]
and we’ll be able to see our merged road
[00:04:22.830]
and topography surface that we can then use in our model.
[00:04:28.610]
If I bring that in we can see we’ve now got that design
[00:04:32.800]
of our road on our topography surface
[00:04:36.130]
and it’s across the entire area.
[00:04:38.070]
So this will work nicely in the model
[00:04:40.100]
that we’re about to create.
[00:04:44.680]
Now that we’ve got this surface that we can use,
[00:04:48.240]
we’re going to go to our geological models folder
[00:04:49.990]
and we’re going to make that new model that will allow us
[00:04:52.120]
to generate the volumes of fill and cut.
[00:04:56.040]
So I’m going to select a new geological model here.
[00:05:00.490]
And for these initial settings,
[00:05:01.900]
we’re going to set our base topology as none
[00:05:04.250]
because we’re going to create our own units
[00:05:06.450]
which are going to be cut, fill and remain.
[00:05:11.360]
We don’t need to worry about the resolution here
[00:05:13.440]
’cause we’re just using existing meshes
[00:05:15.390]
to build this model from.
[00:05:18.030]
And we just want to set the extents of our model here.
[00:05:21.610]
So I’m just going to press D on my keyboard
[00:05:25.150]
so it’s top down, and I’m just going to extend my boundary
[00:05:32.040]
for this model to the areas where I have
[00:05:36.010]
my excavation design.
[00:05:39.890]
I’m then just going to name this model
[00:05:42.010]
so I’m just going to call it cut and fill.
[00:05:47.880]
And we can see we’ve now got this model in our project tree.
[00:05:54.800]
If I bring that into the scene,
[00:05:56.420]
we can see we’ve got our blank model there.
[00:06:00.960]
And if I turn off that merge mash,
[00:06:05.310]
we can see it’s currently using that typography surface,
[00:06:09.400]
which is why we could see some of the model volume above
[00:06:15.560]
that design mesh we had in the scene a second ago.
[00:06:21.360]
The first thing that we want to do for this
[00:06:23.380]
is to turn off the topography as part
[00:06:25.840]
of the boundary settings for this model.
[00:06:28.800]
If we double click on the boundary folder for the cut
[00:06:31.630]
and fill model, we can simply untick,
[00:06:34.600]
use topography as one of the boundaries in
[00:06:36.890]
our boundary settings.
[00:06:40.590]
And if we click that, we’ll now see we just have
[00:06:45.010]
our boundary without it using the topography
[00:06:48.870]
as the upper extent.
[00:06:53.870]
This means that we can now have volumes above
[00:06:56.370]
that topography surface.
[00:06:57.620]
So if we didn’t turn off that topography in the boundaries,
[00:07:01.420]
we wouldn’t be able to generate the fill volumes above
[00:07:04.480]
the topography surface.
[00:07:09.430]
Something else that we can do for this boundary
[00:07:13.180]
for our cut and fill is we could set it just
[00:07:15.700]
to around where we have this excavation design.
[00:07:20.470]
If I was to click on the dropdown for my design mesh here,
[00:07:26.090]
I can see I’ve got the border edges for my excavation
[00:07:32.500]
or my road surface.
[00:07:35.050]
And if we were to export this out and import this back into
[00:07:37.950]
Leapfrog under the polylines photo,
[00:07:39.860]
we can actually go to our boundary folder in our cut
[00:07:43.217]
and fill model and set the boundary of this cut and fill
[00:07:51.140]
to that road design edge.
[00:07:56.710]
If I let that process and turn my model back on,
[00:08:00.440]
we’ll see that it’ll now constrain the cut
[00:08:02.937]
and fill volumes to where we have that design extent.
[00:08:10.120]
This isn’t a required step but it can be very useful.
[00:08:14.840]
You can also use this same process to set individual cut
[00:08:19.780]
and fill zones if you wanted to break down
[00:08:22.600]
the excavation into segments.
[00:08:29.360]
The next step that I need to do is to sort
[00:08:31.350]
of define some lithologies in this model
[00:08:33.770]
that I can create volumes for.
[00:08:36.980]
To do this I’m going to double click on the lithologies folder
[00:08:39.660]
in my cut and fill model.
[00:08:43.210]
And we’re simply going to add in a couple of units
[00:08:46.620]
that we can designate for this model.
[00:08:51.544]
So we have cut, fill and remain.
[00:08:58.340]
We now want to bring in the topography surface
[00:09:02.570]
and our excavation surface.
[00:09:06.180]
We’ll start with our topography so we’re going to go
[00:09:08.230]
to our surface chronology for this cut and fill model.
[00:09:11.720]
We’re going to use new deposit from surface.
[00:09:17.510]
I can then select my typography surface
[00:09:25.280]
and we want to set it so that for this,
[00:09:27.480]
anything above it is going to be fill and anything below it
[00:09:34.940]
is going to be remain.
[00:09:41.400]
If I turn off the model in the scene
[00:09:44.690]
and bring in that surface, we can see it fitting in
[00:09:49.380]
the boundary of the cut and fill volume.
[00:09:53.980]
We now want to add in the excavation surface.
[00:09:57.690]
And to do this we’re going to go again
[00:09:59.230]
to our surface chronology for our cut and fill model
[00:10:01.833]
and select to new erosion from surface again.
[00:10:06.200]
And this time we’re going to select
[00:10:07.480]
that merged surface we created earlier for that design
[00:10:11.410]
so in this case our road and topography.
[00:10:17.210]
In this case we want anything above the design to be cut
[00:10:22.775]
and we’re going to leave the second lithology as unknown.
[00:10:27.050]
If I click okay and once that finishes processing,
[00:10:30.300]
we can bring that into scene to have a look at.
[00:10:36.039]
Here we go.
[00:10:38.370]
So we can see that wherever we have our cut
[00:10:46.350]
or our excavation surface below our topography,
[00:10:50.510]
this is going to be an area of cut volume.
[00:10:56.030]
Wherever we have the topography surface below
[00:11:02.780]
the excavation surface, this is going to be our fill volume.
[00:11:10.020]
Now, to get these volumes all I need to do
[00:11:13.210]
is double click on my surface chronology
[00:11:15.290]
and activate the surfaces, making sure
[00:11:18.160]
that they’re in their correct order
[00:11:19.640]
because we want the remain and fill volumes
[00:11:22.730]
to be generated first.
[00:11:24.600]
And then the excavation surfaces to generate
[00:11:27.210]
the cut volume afterwards.
[00:11:30.710]
If I click okay, that will process.
[00:11:34.050]
And once that’s finished processing,
[00:11:35.570]
we can see our fill volume and the volume
[00:11:39.530]
that we’re going to be using to cut against
[00:11:41.640]
our geological model.
[00:11:47.300]
So here we go.
[00:11:50.640]
And I’ll turn the (indistinct) on here
[00:11:52.020]
to make it a little bit easier.
[00:11:53.240]
So remembering our fill volume is this blue unit here.
[00:11:59.690]
Our cut volume is this purple unit at the top.
[00:12:04.880]
And the remaining unit is everything else essentially.
[00:12:10.380]
Now, you might look at this and see
[00:12:12.460]
that the cut volume extends to the boundaries of our model.
[00:12:17.270]
There’s a lot larger than the actual volume
[00:12:19.910]
that we’re excavating.
[00:12:23.000]
And that’s because we’re just going to be using this volume
[00:12:25.980]
to see where it overlaps with our existing geological model,
[00:12:30.020]
which will then give us a more realistic cut volumes
[00:12:34.740]
for each geological unit.
[00:12:39.440]
So I’m going to clear my scene here.
[00:12:42.740]
And to do this last step we’re going to go
[00:12:45.080]
to our combined models folder.
[00:12:47.000]
And this will allow us to combine that cut volume
[00:12:50.020]
with our geology fill models or volumes.
[00:12:54.160]
So I’ll right click combined models here
[00:12:56.470]
and we’ll select new combined model.
[00:13:00.110]
We’ll select our two models and click okay.
[00:13:06.070]
We can then see the individual volumes
[00:13:08.900]
for each of these.
[00:13:09.780]
So I only want to use the cut volume from my cut
[00:13:12.880]
and fill model, but I want to use all
[00:13:15.630]
of the geological volumes.
[00:13:18.310]
And so this will give us wherever these volumes
[00:13:21.390]
overlap each other.
[00:13:24.410]
It will show those discrete units.
[00:13:28.930]
Now, we can change the order that the models generate
[00:13:32.450]
and all that does is change the naming convention.
[00:13:35.340]
So with it in this order, we’ll have the units
[00:13:37.900]
as cut, geological unit.
[00:13:42.980]
The last step here is to name our combined model.
[00:13:46.410]
And I’m just going to call this cut road and click okay.
[00:13:56.430]
This will now process.
[00:13:58.090]
And once it’s finished processing,
[00:14:00.080]
we can bring this into our scene like so.
[00:14:04.050]
And we can now see our individual cut volumes
[00:14:09.820]
for our geological model.
[00:14:12.150]
So at the top we can see we’ve got our top soil over the top
[00:14:15.100]
of all this so I’m just going to turn that unit off.
[00:14:18.230]
And then underneath, we can see all
[00:14:19.920]
of the other geological volumes.
[00:14:25.120]
You’ll notice that the volumes in our combined model are
[00:14:29.190]
different so all we need to do is edit the colors here
[00:14:33.210]
and we can match our unit colors in our combined model
[00:14:39.890]
to that of our geological model if we like.
[00:14:47.160]
If I click on one of the units or volumes in my scene,
[00:14:52.850]
I can see what unit it is and the volume
[00:14:58.110]
that we’re expecting to cut of this unit based on how
[00:15:02.500]
in this case road design.
[00:15:04.490]
So that gives us an indicator of the expected excavation
[00:15:08.170]
volumes for each of our units.
[00:15:10.670]
So I can again, click on say this unit here,
[00:15:13.130]
we can see it’s unit seven and the volume of excavation.
[00:15:19.110]
I can also right click on my combined model
[00:15:22.070]
in my product tree and go to properties.
[00:15:24.770]
And in this table here we can see all
[00:15:27.170]
of the units in our combined model,
[00:15:30.810]
in this case for our cut volumes of geology.
[00:15:37.750]
If I now bring in just the fill volume from my cut
[00:15:44.540]
and fill model, I can now see my fill in this blue.
[00:15:50.730]
And actually I might just change that to say red
[00:15:53.220]
to make it stand out a little bit better.
[00:15:54.750]
There we go.
[00:15:56.880]
So I can now see my fill volume.
[00:15:58.620]
And again, I can click on this and we can see we’ve got
[00:16:00.750]
our fill here and the volume of fill we’re expecting,
[00:16:04.940]
alongside all of the cut volumes for each
[00:16:07.660]
of our geological units.
[00:16:14.570]
We have a wealth of information available online
[00:16:17.450]
at seequent.com where you can find more about our solutions
[00:16:21.450]
including case studies and blogs.
[00:16:24.710]
You can also find self-learning content
[00:16:27.010]
and guides at my.seequent.com/learning.
[00:16:32.220]
You can also see what webinars and guided trainings
[00:16:35.480]
we have coming up by visiting seequent.com/community/events
[00:16:41.240]
or by contacting your local Seequent team
[00:16:43.800]
and asking about any training or project assistance
[00:16:46.770]
requirements you have.
[00:16:50.480]
As always you can also contact us at [email protected]
[00:16:55.160]
for any questions or queries.
[00:16:58.280]
Thank you so much for joining today’s technical Tuesday.
[00:17:01.270]
I hope you enjoyed it and have a great week.