


Improvements to the vein modelling tool make this tool stronger than ever.
Leapfrog’s vein modelling tool was an industry first in bringing power and ease to the modelling of veins. This fully dynamic workflow tool was primarily designed for modelling of simple open vein geometries – simply because these are by far the most common geometries for veins to have.
Increasingly however, our users want to apply the power of the vein modelling workflow to more complex continuous geometries – for example re-folded horizons in high grade metamorphic belts. Particularly in underground mine settings, it is common in these setting for drillholes to pass through multiple folded limbs of the same mineralisation horizon.
In the previous release, we first enabled users to model these geometries by allowing them to create suitably complex reference planes in the meshes folder and apply these to veins.
We continue to build on this power with two great new additions to the new release.
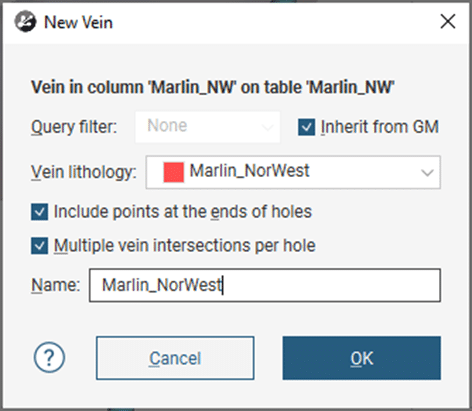
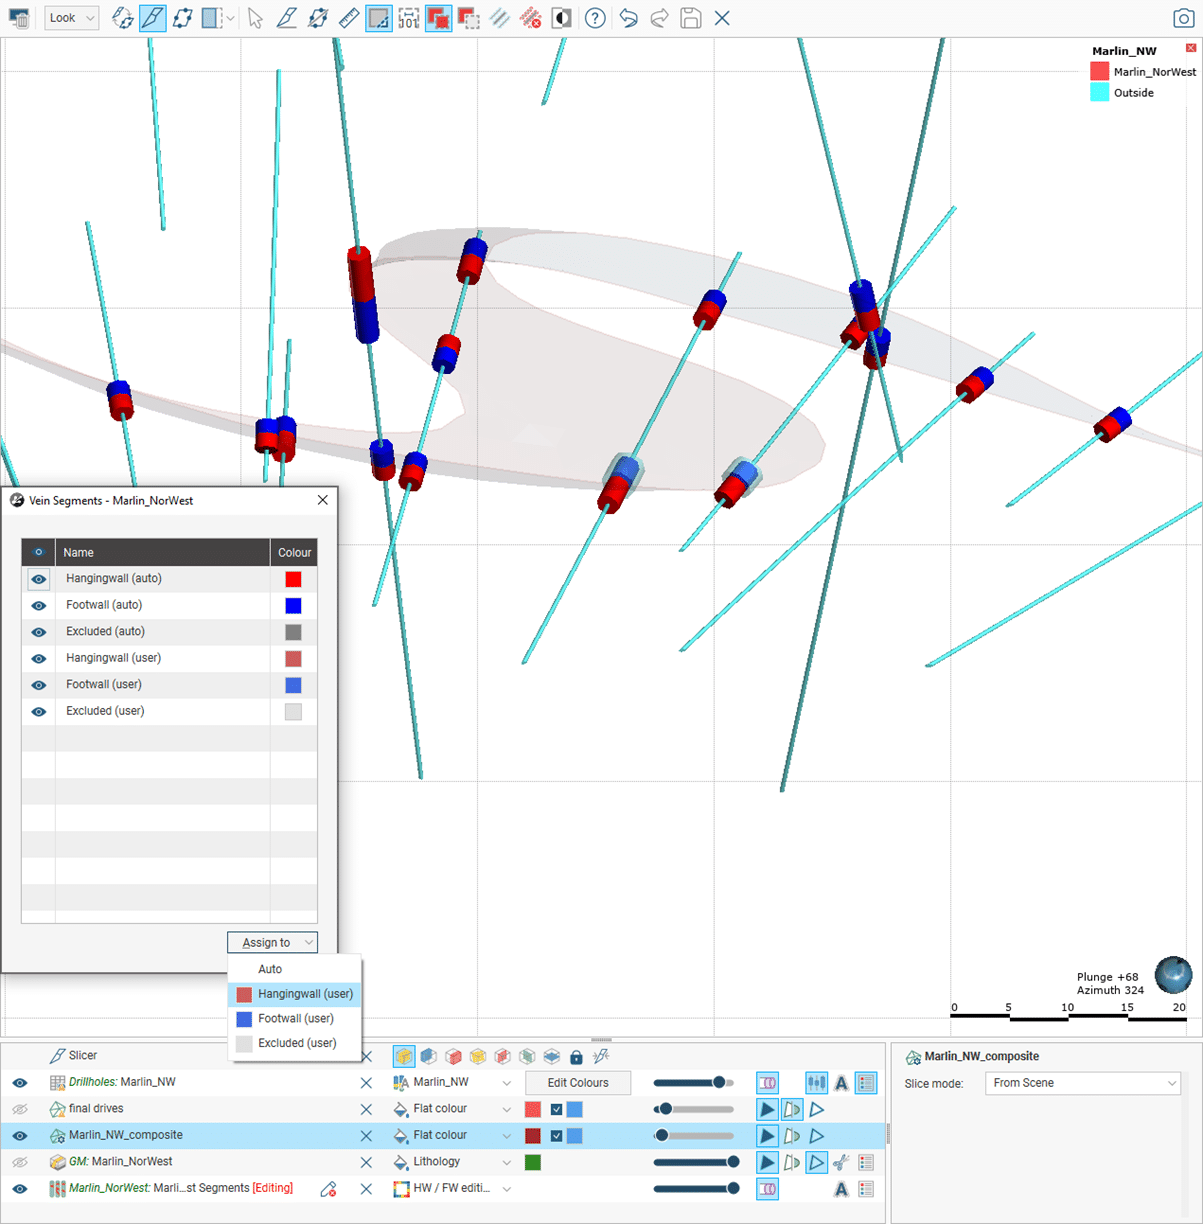
Multiple vein intersections per hole
While small, this little option on the vein creation dialogue brings significant new power to the modelling of complex vein geometries.
What does this option do? Simply put, invoking this option changes the way vein intersections are treated, with a vein segment classification being created for each vein intersection. Previously, the vein tool would only classify the first and last segments occurring in a drillhole, leaving internal segments unclassified. This change of behaviour is illustrated below. The brown line illustrates the general geometry of the fold.
Note that the vein segments in the example above all point in the same direction – which clearly contradicts the fold geometry. This nicely illustrates how the dynamic workflow of the vein tool operates under the hood – a vein and all the attendant components (interval segments, contact points midpoints) is first created based on a set of initial assumption – these are then modified to achieve the desired outcome.
In this case, the user selects a suitably curved reference mesh created with the tools in the meshes folder, and the interval segments are re-classified relative to that.
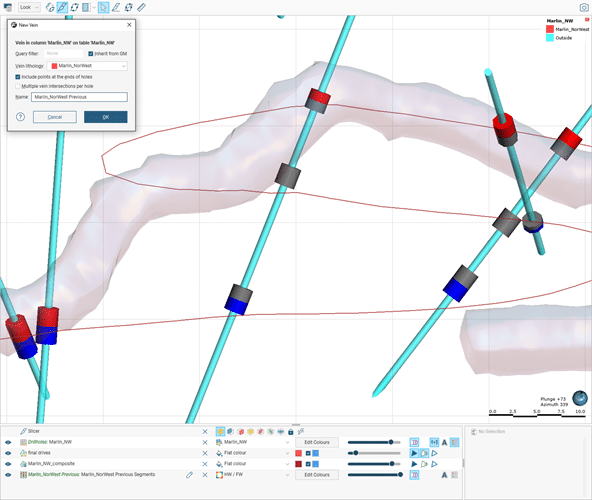
Previous behaviour
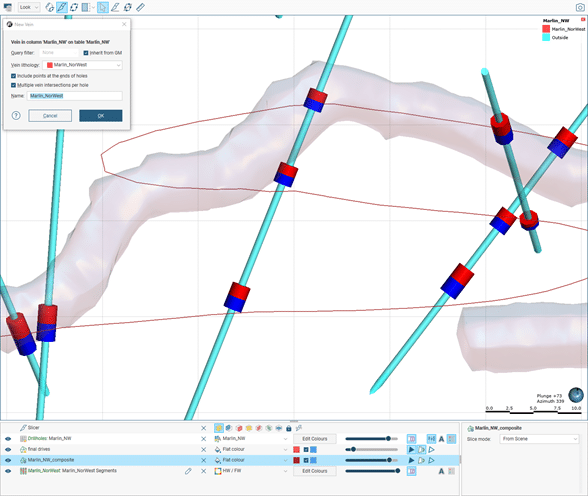
Current behaviour– initial vein segment classification
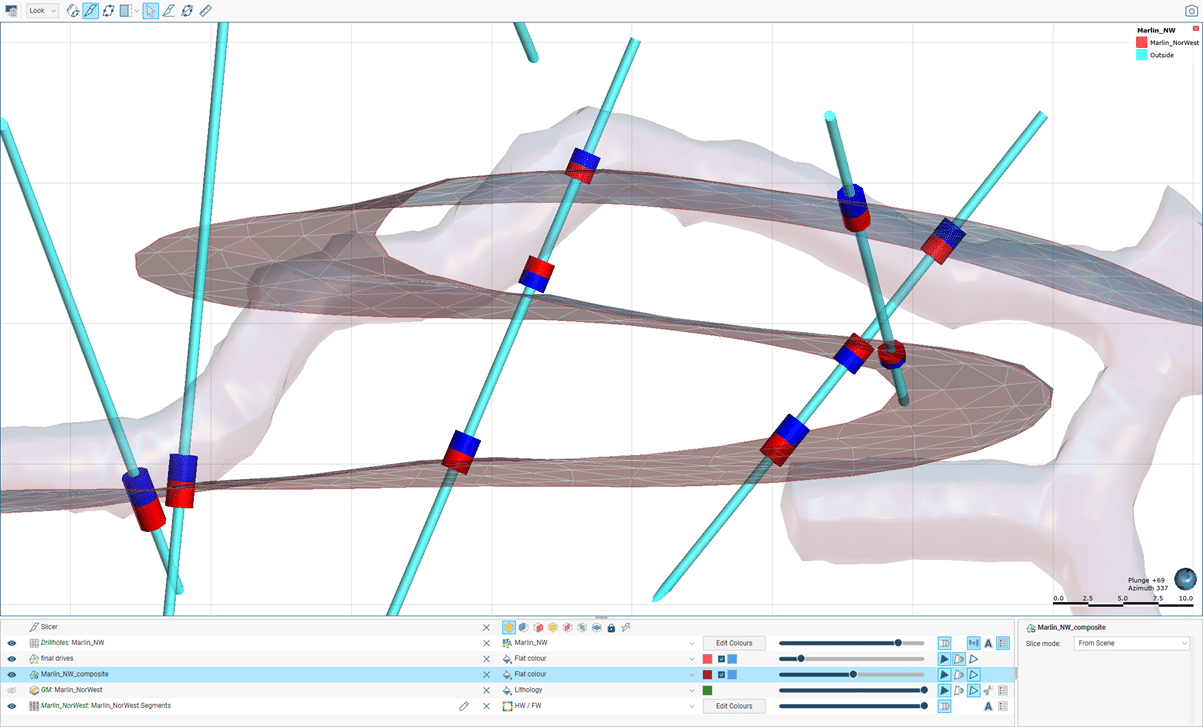
Current behaviour – after selection of ‘customer reference mesh’
Bulk editing of interval segments, midpoints and pinchouts
The change in behaviour described above will greatly reduce the amount of in-scene editing required of vein segments – but will never entirely eliminate it. Editing just got much easier – with the implementation of bulk editing of interval segments.
This new functionality is so intuitive, it scarcely needs describing – simply use the visibility button to toggle on or off the visibility of segment types, the selection tool to choose the interval you wish to change, and assign these to the desired category, all through an easy interface. Midpoints and pinch-outs are even simpler.
A dynamic workflow for modelling complex veins
- Clean data: An important pre-cursor to use of the ‘multiple intersections’ option is to ensure that vein codes/interval selections traverse the full width of all vein intersections. If there are gaps in continuous coding, missing values, or missing intervals, an intersection with classified segments will be generated for EACH discrete intersection.
- Create a custom reference surface:
a. Create a category composite based on the vein category (i.e. generate a single composite per intersection). Generate a query filter based on the ‘primary’ unit to isolate the vein comps.
b. Create ‘new interval mid-points’ based on the above composite. These two steps ensure that the data used to build the reference surface remain dynamic.
c. Create ‘new mesh from points’, based on the above. Edit with structural disks as necessary.
d. (In future, an option will be available to create ‘New mesh’ / ‘From vein midpoints’, replacing the three steps above). - Create a vein model based on the vein category/interval selection, ensuring that ‘multiple vein intersections per hole’ is ticked.
- After the vein object is created, edit ‘Vein reference surface’ and choose the mesh created at step 4.
- Review vein segments and edit as required.
- Review final vein model and surface resolution.
Adaptive Isosurfacing
A final mention is reserved for the addition of an ‘adaptive isosurfacing’ option, available on the ‘Surfacing’ tab. This option is valuable for situations where fine resolution is required around detailed information such as channel sample or face mapping, but where much coarser resolution can be applied where data is less dense, such as around the peripheral projection of a vein.
Further improvements to this great tool are planned.