


Objective:
To create a zipped copy of a Leapfrog project and send it through to the support team for troubleshooting.
Resolution:
There are two steps to sending a Leapfrog project to the support team:
- Create a zipped copy of the project files
- Upload the zipped copy to the Sharefile link provided
To achieve step 1, there are two methods available. Which one to use depends on whether or not the project can be opened in the Leapfrog application.
Method 1 – For projects which can be opened in the Leapfrog application:
- Open the project in Leapfrog
- Open the Leapfrog menu and select ‘Save a Zipped Copy’
- Choose a filename and location and press Save
- Wait until the zipped copy is saved
Method 2 – For projects which cannot be opened in the Leapfrog application:
- Open Windows Explorer
- Navigate to the location that the project is saved
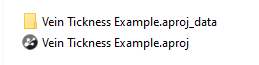
- Select both the .aproj project file and .aproj_data project folder
- Right click -> Send To -> Compressed (zipped) folder
- Wait until the zipped copy is saved
For step 2, a Sharefile link should have been provided by the support agent requesting the project. To upload the project:
- Open the Sharefile link in an internet browser
- Enter details if required
- Either drag the zipped copy of the project into the window or click the ‘browse files’ button and select it
- Press the Upload button in the bottom left corner
- Wait for the upload to complete
Notes:
When sending projects to the support team it is important to send through a zipped copy as transferring project files in an unzipped format can cause project corruption.
It is also important to include both the project file (.aproj) and project data folder (.aproj_data) as both are required in order to open and view the project.
 |
 |
| Project folder. This is the one that needs to be zipped. | Content of the project folder. There may also be a .lock file present. But these are the required files. |