


Objective:
This article will explain how to activate, configure, and sign into your Leapfrog Geo seat using your Seequent ID.
Resolution:
Getting started:
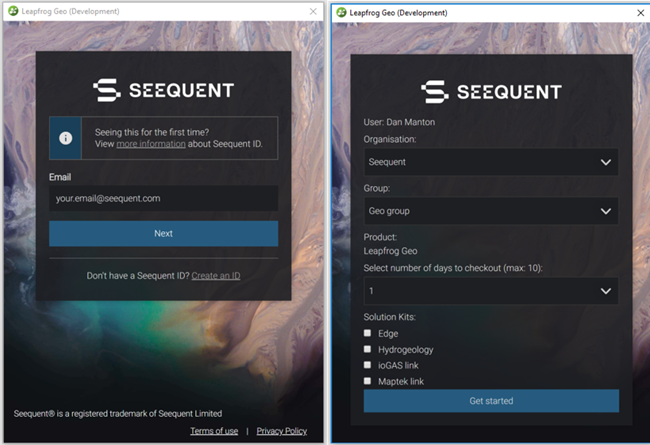
When you start up Leapfrog Geo for the first time, a dialogue box will appear allowing you to sign in using your Seequent ID. If you do not have a Seequent ID, create one in My Seequent or follow the link in the prompt.
Be sure you have the latest version of the software. Visit the Leapfrog Geo release page on MySeequent.
How to access a seat:
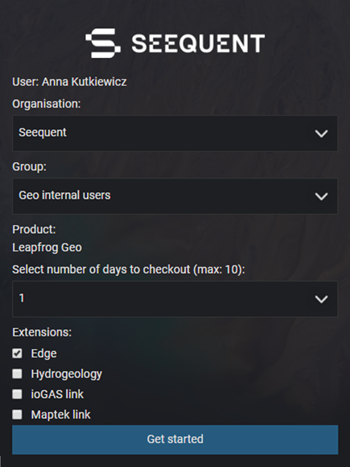
After logging in, choose your organisation and group (if you have multiple options), and select the number of days you would like to check out. If you have any extensions available to you, you can also check them out here.
How to sign out:
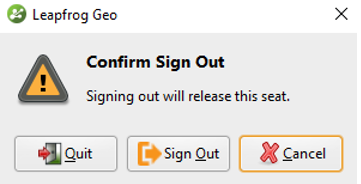
If you are accessing a Shared seat, signing out will release the seat back into the Shared seat group for other users in your organisation to access. To do this, click on your name in the top right corner of Leapfrog Geo and select Sign Out. To maintain the seat for the remainder of your checkout period, select Quit, or keep the program open.
How to Configure and Use Reference Codes
If your organisation is using reference codes to track Leapfrog use, please follow the steps below to configure your reference code. Note: not all organisations use reference codes.
How to Configure Your Reference Code(s)
Each user will need to configure reference codes relevant to that user in the system. Some users may have only one code, while others may have multiple codes. Users should work with their admin to determine which code(s) are relevant for them. To configure your reference code, please follow these steps:
- Launch any Leapfrog application (Geo, Works, or Geothermal), sign in, and choose your seat and checkout period.
- Go to Settings > Usage Policy. Under Reference Code check on ‘Prompt at project start-up’ and ‘Always required’.
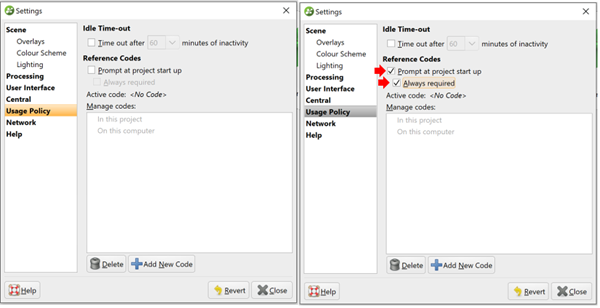
- Click the ‘+Add New Code’ button. In the pop-up box, enter the reference code exactly as your admin has communicated it to you. You may need to ask your admin if you haven’t been provided with your reference code(s).
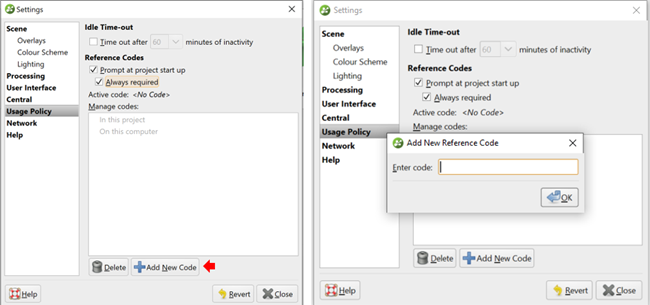
- Click ‘Close’, and you’ve finished configuring your reference codes. Please see below for instructions on signing in with your reference code.
Instructions for Signing In with Your Reference Code
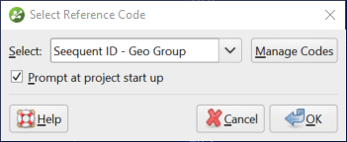
- Whenever you open a project within a Leapfrog application, you will be presented with a dialogue box to select your reference code before you start.
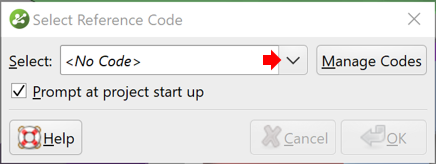
- To select your reference code, simply click the down arrow and choose the correct one. The code(s) displayed should match the ones you entered when you configured your reference codes. Click ‘Ok’ and you’re ready to go.
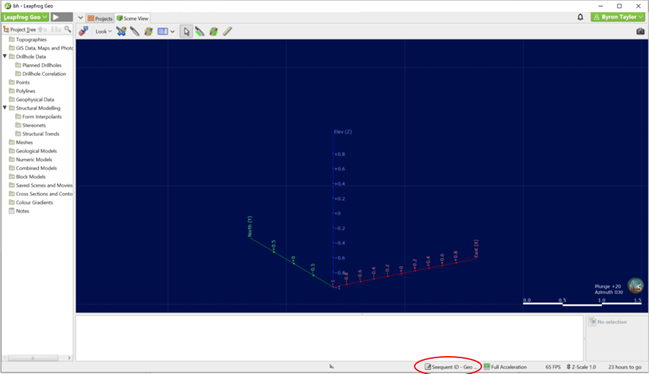
- If you’d like to change the reference code in the middle of your session, you can click on the code at the bottom of the main Leapfrog application window.
Your software use will be associated with your reference code, enabling admin to roll-up utilization to support internal reporting.