


Objective:
I have a assay data along my drill holes and I would like to create veins from it.
Resolution:
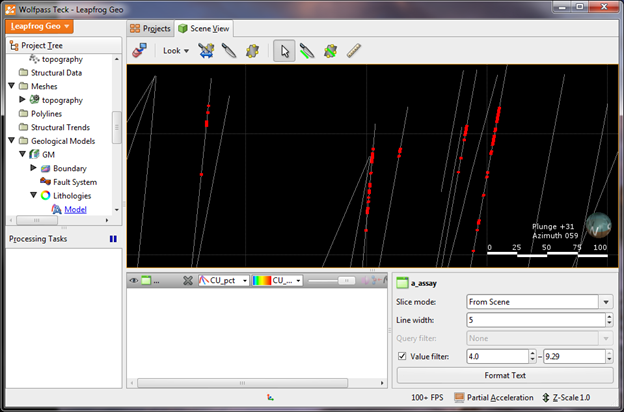
- Display your drillholes colored by the assay values of your choice. In the Properties panel, set a Value Filter for the values of interest, for example Cu > 4. This step is optional; if your veins are already fairly well defined by their assay values, this step might not be necessary and you can jump right to interval selection. This step simply allows for filtering out low values when making your interval selections.
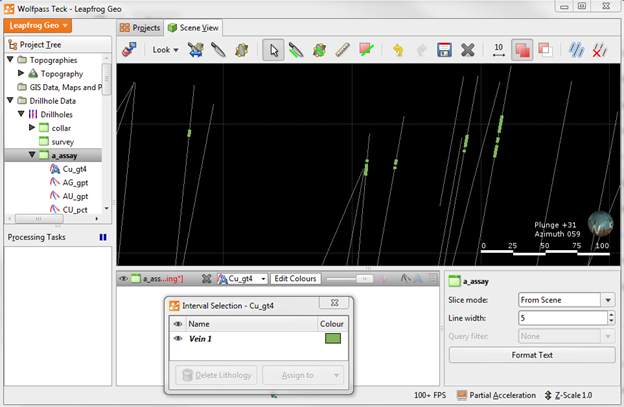
- Right click on your assay table > Interval Selection. Leave the Base Column as None and give your new column a name.
- The current table display will be changed to your newly created field so the scene window will appear blank (or show empty drillhole traces). Change back to assay field (Cu) in the dropdown and make sure you’re viewing only the queried out intervals (check this in Properties Panel).
- Once you are viewing your intervals of choice, make interval selections on the segments you wish to use to build your vein.
- Once you’ve finished making your selections, click Assign to in the Interval Selection dialog box, give your vein a new name. You can select multiple veins in the same interval selection table, but make sure all your veins have unique names. You can switch between colouring your drillholes by your assay value column and your new interval selection column to check your selections. Save and Close.
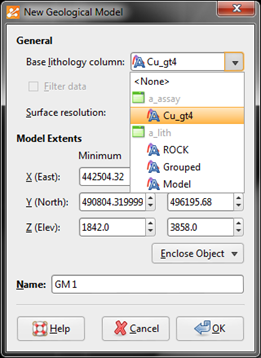
- Now that you have selected your vein intervals, right click Geological Models folder > New Geological Model. Select your new interval selection column as your Base Lithology. Set extents.
- Now create a new vein under Surface Chronology.
- To edit the extents of your new vein, right click the vein in the Project Tree > Edit Vein Boundary
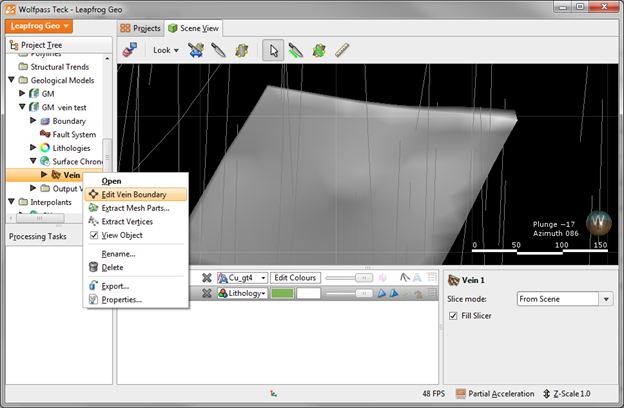
- Draw a polyline to define the outline of the vein you want, click Save and the vein will automatically re-run to fill the new outline.