


Discover Seequent Central
A cloud-hosted system that lets you stay connected as a team to make confident decisions together, wherever you are.
Central enables you not only to track, manage, and version control your geoscientific data but provides a virtual environment in which your team members and other project stakeholders can effectively visualise and review models, exchange ideas, and define the next steps in near real-time.
Learn how Central can help you in optimising existing workflows through coordinated data sharing and save digital storage space & time through our Cloud technology.
Duration
44 min
See more on demand videos
VideosFind out more about Seequent Central
Learn moreVideo Transcript
[00:00:01.610]<v Gary>Hello and welcome to today’s webinar,</v>
[00:00:05.017]“How Central Helps Teams Work Remotely.”
[00:00:08.710]My name is Gary Johnson
[00:00:10.260]and I am one of the customer solutions specialist
[00:00:12.920]for Seequent Civil and Environmental team.
[00:00:15.720]If you haven’t spoken with me
[00:00:17.530]or one of my colleagues on the support team,
[00:00:20.230]I urge you to reach out and we would be happy to help
[00:00:22.560]with your projects or answer any questions
[00:00:24.500]that you might have.
[00:00:26.230]We are here and happy to help.
[00:00:29.050]I know that many of you are currently working remotely,
[00:00:33.020]but I like to keep in mind that we’re still here
[00:00:35.170]and very happy to help,
[00:00:37.040]and you can still reach us at any time.
[00:00:43.190]Some of the guidelines and or software requirements
[00:00:46.420]for today’s webinar,
[00:00:48.180]in order to go through the entire workflow
[00:00:50.260]of what we’ll be demonstrating,
[00:00:52.210]you will need Central and Leapfrog Works.
[00:00:56.780]One thing to note, the audience will be muted
[00:00:58.930]during the demonstration.
[00:01:00.910]For any questions that you might have,
[00:01:02.480]please use the chat window and go to webinars,
[00:01:04.810]these will be followed up within 24 to 48 hours.
[00:01:09.540]Please also kindly stay on the line
[00:01:12.390]after the webinar has completed
[00:01:14.130]to partake in a short survey.
[00:01:15.950]This will only be brief and a few questions
[00:01:17.910]and is very much appreciated by myself and my team.
[00:01:24.440]At Seequent, our vision is to enable better decisions
[00:01:27.920]about the earth, environment and our energy challenges.
[00:01:35.430]Very often, we’ll be working with data
[00:01:37.720]and projects and a team.
[00:01:39.950]And the decision process requires first of all,
[00:01:44.100]accessibility to the data,
[00:01:46.510]but of course, we want to be able to collaborate,
[00:01:48.360]we don’t want decisions to be made
[00:01:49.960]on a single person’s input.
[00:01:52.420]And then of course,
[00:01:53.253]once you’ve made some decisions and collaborated,
[00:01:55.300]we want to be able to audit and or make edits
[00:01:58.560]to the models and or anything involved
[00:02:02.890]in the decision-making process of the project.
[00:02:05.580]And so our projects are very complex
[00:02:09.250]and they often have a long life cycle.
[00:02:12.020]This often requires specialized professionals to collect,
[00:02:15.210]analyze, and interpret data.
[00:02:18.350]We know that data accessibility and transparency
[00:02:20.850]throughout the project’s life cycle is very important,
[00:02:24.100]and we know that many different individuals
[00:02:26.083]often need to actively collaborate
[00:02:28.780]and or communicate with the project and the data involved
[00:02:31.710]in order to end up at an ultimate decision.
[00:02:39.500]Of course, many of you are currently working remotely.
[00:02:47.290]Of course, with the current climate,
[00:02:49.210]we understand that many of you might be working remotely.
[00:02:52.780]I myself am also working remotely,
[00:02:54.810]I’ve converted my bedroom to a temporary office.
[00:02:58.870]And my apologies if you hear the train in the background
[00:03:01.860]as I actually live right next to some train tracks.
[00:03:05.980]One thing to keep in mind when working remotely
[00:03:08.640]is that data needs to be organized and stored
[00:03:11.060]in a way that it can be easily accessed, manage
[00:03:13.890]and then integrated
[00:03:15.110]into the ultimate decision-making process.
[00:03:18.400]And so, one of the things that’s really nice
[00:03:21.130]about Seequent Central
[00:03:22.220]is it is a cloud-based server platform
[00:03:25.460]that allows individuals across the globe
[00:03:28.260]to access the models, track changes,
[00:03:32.060]and really enhances model management and collaboration
[00:03:34.730]among teams.
[00:03:37.110]As many of you might be aware,
[00:03:38.900]when sharing Leapfrog projects,
[00:03:41.280]we always urge you to send zip copies
[00:03:44.177]and not store these on a OneDrive and or external drives.
[00:03:48.490]And so, Seequent Central was actually originally designed
[00:03:52.510]to eliminate the painstaking process
[00:03:55.070]of passing around and sharing models,
[00:03:57.020]and then trying to check changes on those.
[00:03:59.020]And so we will demonstrate in this webinar,
[00:04:02.270]how this enables you to do so.
[00:04:06.690]Instant accessibility is of course important
[00:04:10.110]for all phases of the project’s life cycle,
[00:04:12.780]ensuring that one version of the truth
[00:04:14.940]and providing instant accessibility is very important.
[00:04:19.860]And we want to ensure that teams are able to relate
[00:04:22.690]reliable decisions based off multiple inputs fast
[00:04:27.220]and in a safe and secure manner.
[00:04:33.720]We also want to ensure that we remain connected
[00:04:35.990]on all levels,
[00:04:37.370]whether you are technical and you are actually modeling
[00:04:41.010]and creating 3D models,
[00:04:43.210]whether you are one of the decision makers
[00:04:45.890]in this case, likely a project manager,
[00:04:48.830]and or maybe a regulator such as the EPA.
[00:04:52.310]We want to make sure that everyone is involved
[00:04:54.920]at all points in the process,
[00:04:56.520]and that you have complete control over who is involved.
[00:04:59.690]We also want to enable you to QA and QC your models
[00:05:03.470]through time and track changes.
[00:05:06.700]But of course, tell a story,
[00:05:08.380]and so, I like to think of every project as a story.
[00:05:12.540]And how do you communicate that story,
[00:05:14.090]and how do you tell that through time?
[00:05:16.260]Whether it’s the beginning of your project or the end,
[00:05:18.910]and you’re trying to demonstrate
[00:05:20.690]how you’ve made your ultimate decisions,
[00:05:23.510]Central enables you to do so.
[00:05:30.390]Of course, being a cloud-based server,
[00:05:32.910]this allows you to collaborate across distances
[00:05:35.430]and disciplines.
[00:05:37.210]We can manage your model in a single environment,
[00:05:40.850]we can visualize and track changes,
[00:05:43.760]make decisions collaboratively.
[00:05:47.680]And we can also document a coherent audit trail
[00:05:50.870]through time, this is very important,
[00:05:53.230]and often, this is where projects run into trouble,
[00:05:56.560]and we hope to give you a nice and easy solution to that
[00:06:01.050]via Central.
[00:06:02.610]Central allows geologists, geotechnical engineers,
[00:06:07.880]civil engineers, everyone involved in the project life cycle
[00:06:12.000]to have a seat at the table.
[00:06:13.700]And this is really nice because it enhances collaboration
[00:06:18.630]where there might have been some gaps or voids previously.
[00:06:22.750]And so, it brings everyone together into a single platform
[00:06:27.210]on a single team and allows you to move forward
[00:06:30.140]making decisions accordingly.
[00:06:36.680]Of course, we always want to save time and digital space.
[00:06:40.140]Space on a hard drive is very important,
[00:06:42.080]and that’s why the cloud has really revolutionized
[00:06:45.550]in the past few years.
[00:06:47.470]Central is a cloud-based server,
[00:06:49.590]and we also have newly developed a Data Room.
[00:06:53.880]The Data Room is an online based platform
[00:06:58.170]which you can access on your Central portal,
[00:07:00.830]this is also cloud-based,
[00:07:02.680]and you can actually add an organize any file type,
[00:07:06.080]whether it’s a geologic models,
[00:07:07.680]designs, reports, PowerPoints,
[00:07:11.340]any single file type can be uploaded and organized
[00:07:14.510]in the Data Room according to the project.
[00:07:17.050]And so you can keep everything for your project
[00:07:19.470]in a single space ensuring that your lifecycle
[00:07:22.820]is organized of your project,
[00:07:24.537]and you can always go back in time
[00:07:26.990]and see exactly what you might’ve been referring to
[00:07:30.580]and or keep all of your files in a single place.
[00:07:35.490]We also have the ability here in Central
[00:07:38.520]to upload many different versions of a single project,
[00:07:41.810]but only store a single one of those on your local drive,
[00:07:45.260]this can free up a bunch of space
[00:07:46.710]where you previously might have had multiple versions
[00:07:49.750]of a project that are each multiple gigabytes,
[00:07:52.670]now you can only have a single one of those,
[00:07:55.530]the one that you’re currently working on
[00:07:57.470]while the rest of them are stored securely
[00:07:59.540]in the cloud environment of Central.
[00:08:05.390]How does it work?
[00:08:06.320]So this is where we’ll actually jump into a brief demo,
[00:08:09.500]the first thing I will show you
[00:08:10.680]is the Central browser in the middle,
[00:08:12.800]we will then jump into the Central port on the right,
[00:08:15.620]and then we will revert back to the Leapfrog modeling suite,
[00:08:18.830]which you are likely familiar with.
[00:08:21.540]If you are familiar with the Leapfrog modeling suite,
[00:08:23.800]this is of course, where you be creating
[00:08:27.040]and editing your models.
[00:08:29.170]This also is a platform for integrating different meshes
[00:08:35.260]and or surfaces from other Leapfrog models
[00:08:38.250]using the Central portal.
[00:08:40.500]And so, I’ll show you how the Central browser
[00:08:44.010]and Central in general allows you to incorporate
[00:08:46.980]different aspects from different projects into each other.
[00:08:50.360]The Central browser is a really nice platform.
[00:08:53.620]Some of you might have used Leapfrog Viewer before,
[00:08:56.730]Central browser gives you almost complete engagement
[00:09:01.230]with the model,
[00:09:02.570]and we’ll actually demo this in a second.
[00:09:05.670]You can also export meshes and objects
[00:09:08.510]from the Central browser.
[00:09:09.880]You can compare changes through time,
[00:09:12.970]and you can directly compare different versions
[00:09:15.670]of the same model.
[00:09:17.710]And you can also view near real-time drilling,
[00:09:20.370]which is really cool aspect.
[00:09:22.360]Then of course, there is the Central portal,
[00:09:25.430]the Central portal is very useful for both users
[00:09:28.400]and administrators alike.
[00:09:30.240]The Central portal allows you to download
[00:09:32.240]and publish any data to the Data Room,
[00:09:34.430]which I had mentioned.
[00:09:36.160]This can be really useful for organizing your projects data.
[00:09:40.230]For the administrators, you can manage users
[00:09:43.410]and you can also manage access to projects as well.
[00:09:48.470]This is where the security aspect comes in.
[00:09:50.160]You can of course, control who has permissions
[00:09:52.690]to which project,
[00:09:53.660]but you can also remove users from different projects.
[00:09:56.610]And so this is where you as an administrator
[00:09:59.400]would have complete control
[00:10:00.680]over who is on the Central portal,
[00:10:03.000]and two can see what on the Central portal.
[00:10:05.680]You can also view activity,
[00:10:08.610]and of course you can manage partner integrations.
[00:10:13.280]And so I will jump into the Central browser now.
[00:10:17.440]Welcome to the Central browser.
[00:10:20.250]The first thing that you will see
[00:10:21.500]when opening up the Central browser
[00:10:23.900]is going to be your list of projects.
[00:10:26.980]You will also see the Central Server,
[00:10:29.310]likely in this case, you would only have one here.
[00:10:31.650]I have quite a few different Central Servers,
[00:10:34.320]these are all internal facing.
[00:10:36.370]This is what we use for our demos
[00:10:38.290]and or to collaborate on projects across the globe.
[00:10:41.680]So I have many projects on here
[00:10:43.380]where I have colleagues who are in Europe or in APAC
[00:10:46.420]or in Australia and New Zealand,
[00:10:48.310]and we are all editing the same versions
[00:10:52.030]or the same project,
[00:10:54.370]and so we can work on different versions of that project
[00:10:58.210]and or collaborate in a single space.
[00:11:01.370]The project I will actually be discussing here
[00:11:03.370]will be Lake Aura.
[00:11:04.510]This is actually the civil and environmental demo project,
[00:11:08.240]which if you have downloaded Leapfrog Works
[00:11:10.590]and or use the trial previously,
[00:11:12.800]you actually have access to this model.
[00:11:14.910]If you don’t, just let us know,
[00:11:17.470]don’t hesitate to reach out
[00:11:18.620]and we’d be happy to pass along this demo model
[00:11:24.990]Central and the Central browser
[00:11:28.530]gives you almost full visualization into the Leapfrog model.
[00:11:32.410]While you can’t actually edit anything
[00:11:34.540]in the Central browser,
[00:11:35.950]you can control almost all of the visualization settings.
[00:11:39.730]If you have used Leapfrog Viewer before,
[00:11:41.790]you might have seen that the controls of the visualization
[00:11:45.410]and the objects that you were seeing in the view
[00:11:48.010]are not the full settings that you see in Leapfrog,
[00:11:52.690]and so you don’t have full control over the objects.
[00:11:55.040]Here in the Central browser,
[00:11:56.660]you have almost full control over the objects,
[00:11:59.880]you can see attributes and designs,
[00:12:01.800]you can also apply query filters
[00:12:04.330]and you can change a ton of more visualization settings
[00:12:07.730]as well.
[00:12:10.000]I’ll point out some of the similarities first,
[00:12:12.100]and then I’ll get into a little bit of the differences
[00:12:14.810]between the Central browser and Leapfrog Works.
[00:12:19.560]The Central browser can be accessed by anyone
[00:12:22.560]who has been added to the server.
[00:12:24.590]And so of course, there are different controls,
[00:12:27.190]whether you can export objects for example,
[00:12:29.410]or if you’re just a viewer.
[00:12:31.770]But this can be accessed by stakeholders, decision-makers
[00:12:36.570]and editors alike.
[00:12:38.300]It’s a really good way to QA, QC your projects,
[00:12:41.510]and a great tool for collaborating
[00:12:44.220]and keeping everyone up to date with the latest changes.
[00:12:47.710]You might see on the left that we do have the project tree
[00:12:50.270]still here,
[00:12:51.370]and so this is very similar to the Leapfrog Works interface.
[00:12:54.880]You can control the visualization settings,
[00:12:56.810]you can apply filters,
[00:12:58.550]you can control the opacity on different objects here,
[00:13:03.270]and you have almost full control into visualization settings
[00:13:06.960]of objects that have been uploaded.
[00:13:09.130]We also then of course can use some of the toolbar settings
[00:13:12.030]up here, my favorite being the slicing tool.
[00:13:14.810]So we could still cut through the model,
[00:13:16.810]slice through the model in real time.
[00:13:21.160]Go ahead and turn that off.
[00:13:24.370]Now, some of the differences of course,
[00:13:26.630]you might see right here on the right
[00:13:28.550]that we have our annotations tab.
[00:13:30.980]This is really cool,
[00:13:31.870]it actually allows you to add annotations to the model
[00:13:34.750]with the geotag.
[00:13:36.090]So it’ll take you directly to that place,
[00:13:38.060]in the X, Y, Z place that you had referenced.
[00:13:41.300]Here, I’ve made a little note to refine the shoreline,
[00:13:44.610]and the really nice thing is it’ll show the scene
[00:13:47.340]when that annotation was created.
[00:13:49.920]So if I click show scene,
[00:13:55.040]you can see that it reverts back to that perspective
[00:13:58.310]as when this was created.
[00:13:59.940]Here, one of the issues with this project,
[00:14:02.010]it is a tunneling project in a seaway,
[00:14:04.640]was that the shoreline wasn’t too accurate.
[00:14:07.120]And so what we wanted to do was we wanted to edit the model
[00:14:10.450]on a future version to refine the shoreline.
[00:14:14.350]I’ve added another little annotation here
[00:14:17.000]where we want to double-check the tunnel depth
[00:14:18.870]as the CAD design that had been imported
[00:14:22.450]seems to in this case, the red CAD design
[00:14:26.690]cut through the model where water is,
[00:14:29.350]and so of course, we know we want this tunnel
[00:14:31.930]to be in the subsurface and not cutting through water.
[00:14:35.740]This is something that I li I pointed out
[00:14:37.590]just as an issue and just as a demonstration.
[00:14:41.060]But really nice thing is we can,
[00:14:42.740]anyone who has access to this version of the model
[00:14:45.430]can come in and add an annotation
[00:14:47.720]with the geotag associated with it,
[00:14:50.340]that will automatically take you to that location.
[00:14:53.080]You can also add details here as well,
[00:14:58.347]and I’ll go ahead and X out of that.
[00:15:00.820]If you have shared this with multiple collaborators,
[00:15:03.700]the collaborators can then come in
[00:15:05.160]and edit different comments,
[00:15:07.810]they can also reply on comments.
[00:15:10.750]This is really nice for QA, QC processes
[00:15:13.810]as you can question, you know,
[00:15:15.690]why did you place the tunnel design here?
[00:15:18.650]That might be something that I would ask right away.
[00:15:21.510]Here, you can now see that we have a refined tunnel design
[00:15:23.940]that properly cuts through the subsurface of the model.
[00:15:28.260]Another cool thing here is on top of adding annotations
[00:15:32.150]and replies to comments, you can also add attachments.
[00:15:35.620]This can be any file type,
[00:15:37.870]whether it is you’re referencing a document
[00:15:40.360]and or you might have photos of core logs
[00:15:42.980]that you might want to reference here,
[00:15:44.790]there’s a ton of different file types that you can add here.
[00:15:47.280]Actually, you can add all files.
[00:15:50.170]So, that is a nice option there.
[00:15:54.880]One of the things that you might have noticed
[00:15:57.230]in the beginning is that we also,
[00:16:00.270]if I turn the model back on,
[00:16:03.030]and if I zoom out on the scene,
[00:16:05.150]have a little timestamp down at the bottom.
[00:16:08.240]And so if I wanted to revert back to the version
[00:16:10.930]of the model from January, 2017,
[00:16:14.260]on the 28th of January, 2017, I can click on that model.
[00:16:18.010]You can see that there are clearly some revisions
[00:16:20.170]that need to be done to this model.
[00:16:22.260]We have our schist that is cutting into our sandy gravel.
[00:16:28.710]And so, we can see and document changes through time
[00:16:32.220]on the geologic model using just the timescale
[00:16:34.560]at the bottom as well.
[00:16:36.080]So if I wanted to just step through
[00:16:37.460]and see how this model has changed,
[00:16:40.660]we’ve now created the water.
[00:16:42.770]You can see that we’ve inserted now a little clay lens
[00:16:45.200]in there as well,
[00:16:46.780]and we can continue to step through the project’s life cycle
[00:16:49.620]through time.
[00:16:51.350]So this is a really cool feature of Central
[00:16:55.660]as you can easily track changes through time.
[00:16:58.860]We also have the project history tab at the top.
[00:17:02.110]So when you open up a project in the Central browser,
[00:17:05.350]you get access to the scene view
[00:17:06.990]where you can control the visualization settings,
[00:17:09.970]track your history is through time
[00:17:11.900]and also add attachments and annotations,
[00:17:15.500]we also then can track the project history.
[00:17:19.070]Here you can see that multiple of my colleagues
[00:17:21.040]have updated different versions of this project
[00:17:23.280]through time,
[00:17:24.170]and if I wanted to go in and access that version
[00:17:26.400]of the project,
[00:17:27.233]I can just select it in the project history
[00:17:29.620]and go directly to open that up.
[00:17:33.390]Here, you can see the objects that were uploaded,
[00:17:35.920]that we wanted to have a discussion about.
[00:17:38.590]One way that you can save data via Central
[00:17:42.310]is only uploading objects that you want to see.
[00:17:46.880]And so here, we’ve only uploaded geologic models,
[00:17:49.530]some drilling information and a few meshes
[00:17:51.750]as opposed to uploading the entirety of the model.
[00:17:54.980]This allows you to still go in and discuss
[00:17:57.160]and visualize different aspects of the model
[00:17:59.540]without having to take up the bandwidth
[00:18:01.470]of uploading an entire model.
[00:18:06.020]We can also track changes through time.
[00:18:08.650]We can see who was giving access
[00:18:11.350]if annotations were created.
[00:18:14.310]And so, this is a really nice auditability tool
[00:18:17.860]to seeing how changes have been made through time
[00:18:20.170]and who has access to this.
[00:18:26.010]My personal favorite tool within Central
[00:18:28.270]is the ability to compare different objects through time.
[00:18:31.820]So if I want it to compare my drilling
[00:18:36.240]over the product life cycle,
[00:18:37.660]if I wanted to compare how maybe an output volume
[00:18:40.410]has changed through the project’s life cycle,
[00:18:43.220]this can all be done in Central,
[00:18:44.860]and we have some really cool visualization tools
[00:18:47.070]to be able to do so.
[00:18:49.430]Here, if you wanted to compare any objects,
[00:18:52.100]you can bring those objects into the scene.
[00:18:54.790]Here, I’m going to turn on just the objects
[00:18:57.620]that I want to compare.
[00:19:00.270]Let’s turn that off.
[00:19:02.540]Here, we have just the boreholes.
[00:19:05.200]I think I’m going to turn off the designs as well.
[00:19:13.470]Let’s leave it at this.
[00:19:15.140]You can just select the compare button
[00:19:16.940]and it’ll allow you to compare objects in the scene
[00:19:20.320]over the different versions of the project.
[00:19:23.390]So if I go to compare here,
[00:19:25.740]you can see that I actually have already selected
[00:19:28.720]the boreholes and also an output volume here.
[00:19:33.080]You can then select which versions of the model
[00:19:35.440]you want to compare.
[00:19:36.580]On the left side,
[00:19:37.440]I’ve selected one of the first versions of this model,
[00:19:40.330]on the right side,
[00:19:41.370]I can see that I’ve selected the latest version
[00:19:44.020]of the model.
[00:19:45.450]There’s some really easy way is to toggle
[00:19:47.960]between the different versions here,
[00:19:49.410]you can see in the first model,
[00:19:51.630]we have our granodiorite output volume.
[00:19:56.130]And if I toggle over,
[00:19:57.280]we only have three drilling cores here too,
[00:20:00.790]three boreholes in this case.
[00:20:03.120]If I toggle over to the other side of the model,
[00:20:04.980]you can see that first of all,
[00:20:07.230]the peers, the granodiorite shoreline contact
[00:20:10.980]has changed through time.
[00:20:12.650]And you can also see the new drilling of ice.
[00:20:16.090]Now, if you were reviewing this in the same scene,
[00:20:20.970]there’s also ways that you can enhance the differences
[00:20:24.500]between the two.
[00:20:25.970]So as you saw, there were some new boreholes
[00:20:28.770]that were trilled for this project
[00:20:30.860]from the first stage in 2017,
[00:20:33.530]down to a year later in 2018.
[00:20:36.890]If I wanted to enhance those differences,
[00:20:39.520]I can select the option to enhance those differences,
[00:20:42.620]and that can really show me some of the changes
[00:20:45.260]that have happened through time.
[00:20:47.140]Here, you can see actually some of these boreholes here.
[00:20:51.200]The visualization settings on them will change
[00:20:53.220]when I enhance differences.
[00:20:54.400]And so, these of course,
[00:20:57.210]the ones that are larger are the new boreholes,
[00:20:59.790]and those that have shrank upon enhanced difference
[00:21:02.600]are going to be some of the older boreholes in question.
[00:21:06.250]So just a really easy way to identify some differences.
[00:21:09.820]Another cool option here
[00:21:11.220]is that you can change the visualization settings
[00:21:13.640]on the newer and older surfaces.
[00:21:15.900]Here, if I wanted to change the older granodiorite
[00:21:20.240]output volume,
[00:21:21.370]and maybe let’s wireframe it
[00:21:22.880]so that you can see right through it,
[00:21:25.020]I can do so.
[00:21:25.853]And so you can see over time how we have shrank and edited
[00:21:30.060]that granodiorite contact surface
[00:21:32.740]and subsequent output volume.
[00:21:36.230]The ability to compare changes through Central
[00:21:39.380]in the Central browser is a really cool feature
[00:21:42.810]that has endless possibilities,
[00:21:44.950]and it’s definitely something I ask
[00:21:46.840]if you do sign up for Central,
[00:21:50.320]to take a look at and see how your models have changed
[00:21:53.410]through time and your different versions of those models
[00:21:56.350]have changed.
[00:21:57.490]Whether if we go back to the scene view,
[00:22:00.140]you’re using the little timescale at the bottom,
[00:22:03.030]or the compare tool here in the toolbar,
[00:22:06.020]there’s tons of opportunities here to actually document
[00:22:09.420]and track changes through time,
[00:22:11.480]whether it’s visually and or using annotations,
[00:22:15.160]and or attachments.
[00:22:21.190]Of course, I mentioned that there is the Central portal
[00:22:25.370]as well.
[00:22:26.660]And so, I have many different colleagues
[00:22:29.290]who are on the Central server,
[00:22:32.700]this is our EMENA Civil Demo Server.
[00:22:36.090]And if I wanted to be able to control
[00:22:37.950]who has access to projects I’ve uploaded from Leapfrog
[00:22:42.360]and or access the Data Room,
[00:22:44.520]this can all be done in the portal.
[00:22:46.790]The portal is actually an online cloud-based platform.
[00:22:50.070]And so, you can easily access this directly
[00:22:53.050]in the Central browser by selecting open portal.
[00:22:59.100]This will actually take me directly to the user portal.
[00:23:05.460]So two things, the user portal is friendly for users
[00:23:09.110]and for administrators alike.
[00:23:11.870]Of course, you have access to all of your projects.
[00:23:14.470]Here, we’re demonstrating the Lake Aura project.
[00:23:19.150]And so I can just type into my projects tab, Lake Aura,
[00:23:22.640]and I can select that project.
[00:23:27.630]You can document the different stages of this project,
[00:23:31.560]but at the same time,
[00:23:32.760]you can also access files.
[00:23:38.290]Here is where you could create your Data Room
[00:23:40.800]and organize your files accordingly.
[00:23:43.720]Here you can upload any file type,
[00:23:45.830]this doesn’t have to be a Leapfrog file type,
[00:23:48.500]and keep them organized in a single location
[00:23:50.830]that can be accessed by everyone on this project.
[00:23:55.570]We can also see here in the users tab,
[00:23:58.180]all users that have access to this project.
[00:24:01.450]So I’m myself, Gary Johnson,
[00:24:03.630]enlisted as an owner of this project.
[00:24:06.410]Owners by default
[00:24:07.428]are those who have either uploaded the project
[00:24:10.040]or have been designated an owner by the administrator
[00:24:13.100]on the account.
[00:24:14.720]There’s other permissions here as well,
[00:24:17.100]you can either be a viewer.
[00:24:18.770]And so in the Central browser,
[00:24:20.320]which we were just looking at,
[00:24:21.720]you can visualize and interact with those objects.
[00:24:26.690]An editor is actually allowed to publish changes
[00:24:30.040]and make edits from within Leapfrog
[00:24:32.080]and access the files in that.
[00:24:35.660]And then of course, we have the owner,
[00:24:37.540]the owner is allowed to grant access to this project
[00:24:41.060]from other users.
[00:24:42.550]I mentioned, this is either the individual
[00:24:44.890]who originally uploaded the project
[00:24:47.680]and or if you have been designated,
[00:24:49.440]in this case, an owner by the administrator.
[00:24:54.010]You can also track the project’s history through time
[00:24:58.010]and see the different stages of the project,
[00:25:01.840]which can be designated within the portal itself,
[00:25:05.540]and then upon publishing the model in Leapfrog,
[00:25:11.580]we can also track events.
[00:25:13.850]And so these are actually the exact events
[00:25:15.900]we were just viewing in the Central browser.
[00:25:17.820]So you don’t have to be able to go into the browser
[00:25:19.810]to track some of these events,
[00:25:21.550]you can see them directly in the portal online as well.
[00:25:26.790]We then of course have our users tab.
[00:25:30.960]The users tab would be nice for administrators.
[00:25:33.940]This is where you can search and add a new users,
[00:25:38.110]and control permissions as well.
[00:25:41.280]So if I wanted to add a new user,
[00:25:43.430]I can add them via an email,
[00:25:46.000]I can designate them as a connector,
[00:25:47.630]which allows them to inter-operate
[00:25:50.260]and or access Central within Leapfrog Works.
[00:25:54.250]You can assign them as an admin,
[00:25:56.930]this’ll likely not be the case for everyone
[00:25:58.910]as this does give you full control over the server.
[00:26:02.510]And you can then assign them projects here as well.
[00:26:05.690]So, if you ever have any questions about this,
[00:26:08.460]don’t hesitate to reach out
[00:26:09.630]or reach out to your administrator
[00:26:11.590]who can also likely give you access to projects
[00:26:15.190]and possibly answer some of your questions
[00:26:17.330]about this as well.
[00:26:20.290]We then have an integrations tab
[00:26:21.910]where you can integrate with some of our partners.
[00:26:24.140]We have not set up,
[00:26:25.320]I have not set up any integrations yet.
[00:26:29.120]And then of course,
[00:26:29.953]we can see the events and maintenance tab.
[00:26:33.080]If the server had been updated,
[00:26:34.810]you can track that in the maintenance tab here.
[00:26:39.270]Really nice thing is this also allows you to enter project
[00:26:42.300]stages.
[00:26:43.580]And I will show you where you can also designate projects,
[00:26:46.650]project stages within Leapfrog
[00:26:48.720]when you were actually uploading your model to Central.
[00:27:08.295]I will now jump in to Leapfrog Works.
[00:27:10.880]And so this is a user interface,
[00:27:12.700]as you can see, the project tree in the left over here
[00:27:14.660]that you might be more familiar with.
[00:27:16.970]If I go back to the projects tab here,
[00:27:19.970]you can see some of our projects
[00:27:22.010]that I have been recently working on.
[00:27:23.490]This is where you would typically access your projects.
[00:27:26.570]In order to gain access to the Central projects tab
[00:27:29.780]if you have registered for the Central trial,
[00:27:34.040]you can actually click on Leapfrog Works
[00:27:37.090]and go to the settings option.
[00:27:41.040]Here, there is a Central option,
[00:27:43.230]which you might’ve seen previously
[00:27:44.380]of going through the settings and been unaware
[00:27:45.950]as to what this actually was.
[00:27:48.170]This is where you can actually enable Central integration
[00:27:51.040]using your secret ID.
[00:27:52.860]So if you and or your organization has signed up for Central
[00:27:56.660]and would like to now enable this within Leapfrog,
[00:27:59.230]just keep in mind,
[00:28:00.330]you can do that right here in the settings tab Central
[00:28:03.670]using your current Seequent ID.
[00:28:06.090]This will then pick up any servers
[00:28:08.250]that you have been added to in the Central portal,
[00:28:11.320]which we were just looking at.
[00:28:15.660]Essential projects tab will then arise.
[00:28:18.380]Here, you can see the same servers
[00:28:20.260]that we were just looking at previously
[00:28:23.000]in the Central browser.
[00:28:24.920]I will stay within our EMENA Civil Demo Server,
[00:28:28.330]and I will still discuss this Lake Aura project
[00:28:31.310]which is also the demo project which you all have access to.
[00:28:35.660]I will go ahead and select Lake Aura project.
[00:28:40.460]You will now see that the project history tab will arise.
[00:28:44.660]Here in the project history tab,
[00:28:47.520]one thing that I like to always mention
[00:28:48.980]is the local section here.
[00:28:51.690]And so currently, you see one listed,
[00:28:54.750]and this is because I only have one local copy
[00:28:57.200]downloaded on my hard drive.
[00:28:59.620]The really nice thing about this
[00:29:01.430]is that it allows you to have multiple versions
[00:29:04.300]of the project stored in a single secure cloud-based server,
[00:29:09.520]but you don’t have to use all these projects here,
[00:29:11.717]the projects don’t have to take up space
[00:29:13.870]on your local hard drive.
[00:29:15.940]So many times you might be updating a project
[00:29:19.170]and saving backup copies throughout time
[00:29:21.330]to document your changes,
[00:29:23.190]and these copies might be multiple gigabytes,
[00:29:25.450]and you might have 10 different versions of them,
[00:29:28.030]this can really add up and take up digital space on your PC.
[00:29:32.120]Central then frees up that digital space,
[00:29:35.460]allowing you to access the different versions
[00:29:38.530]or different models,
[00:29:40.050]but only have a single one or two or three
[00:29:43.760]on your local server at a time.
[00:29:46.200]Now, I do have the latest version downloaded,
[00:29:48.990]but if I wanted to download a previous version
[00:29:51.820]and edit and or interact with this
[00:29:54.170]in the Leapfrog modeling suite,
[00:29:56.400]I can go back to one of our previous leading concepts here,
[00:30:00.780]and I can choose to download this model.
[00:30:03.890]I will then have a new local copy of that version
[00:30:07.240]of the model on my hard drive,
[00:30:09.440]which can then be edited and then removed of course,
[00:30:12.140]when you were done with that and republished to the server.
[00:30:18.730]So Central gives you a few other really nice, helpful tools
[00:30:23.700]when you’re actually in the Leapfrog modeling suite.
[00:30:27.430]Many times, you might be working on projects
[00:30:30.260]that are laterally extensive,
[00:30:33.130]and you might only want to model
[00:30:35.260]within a certain section of that model, or of that project.
[00:30:39.500]So for example, if you have a linear infrastructure project
[00:30:42.700]that covers many, many miles,
[00:30:45.030]you might only have to build geologic models
[00:30:48.150]that are detailed along the overpasses and underpasses
[00:30:52.220]for example.
[00:30:53.320]You might have a single conceptual site
[00:30:56.010]that takes up the entirety of the project extents,
[00:30:59.080]and then you might want to break down those individual sites
[00:31:03.190]into different locations.
[00:31:06.010]The nice thing is if you wanted to use a mesh
[00:31:08.730]from a different Central project,
[00:31:11.050]you can right click on the mesh’s folder
[00:31:13.300]and import a mesh from Central.
[00:31:16.300]Here, if you had different conceptual model
[00:31:19.720]for your extensive site
[00:31:21.360]and then smaller project models for areas of focus,
[00:31:26.920]you can directly import a mesh from the extensive site
[00:31:31.370]and use those surfaces or output volumes in your project.
[00:31:35.670]This can be a really nice organizational tool
[00:31:38.390]for breaking up those massive projects
[00:31:40.300]which I see all the time
[00:31:41.570]into more localized and regionalized complex models.
[00:31:47.810]And so, you have access to all of the different meshes
[00:31:51.870]from any Central projects that you have access to.
[00:31:55.490]This can save you a ton of time,
[00:31:57.540]not having to reduplicate surfaces for example,
[00:32:00.980]and also gives you the ability to use surfaces
[00:32:04.330]from a different project
[00:32:05.420]if you’re working in the same location.
[00:32:10.230]Now, if I had made some changes to this project,
[00:32:13.970]for example, edited some contacts, added new boreholes,
[00:32:18.360]I could then publish this model back to the Central Server
[00:32:21.830]so that my colleagues can access it,
[00:32:24.130]make comments and annotations and so on
[00:32:26.750]within the Central browser.
[00:32:29.970]Now, if I go to the Lake Aura project here,
[00:32:33.920]if I had my project open in the scene view
[00:32:36.330]and went back to the Central tab for that project,
[00:32:40.380]there is this button right here,
[00:32:42.230]it looks like a globe with the green arrow,
[00:32:44.310]to publish the latest version.
[00:32:48.200]Anytime you make changes and want to document this project
[00:32:51.650]change through time,
[00:32:53.510]i.e. you can actually see these multiple publishing events
[00:32:57.780]here in the project history,
[00:32:59.400]so each little bulb
[00:33:00.860]corresponds to a different publishing event.
[00:33:04.290]You can go ahead and publish a new version of that model,
[00:33:07.650]which I’ll go ahead and do now.
[00:33:11.970]You can then select the objects
[00:33:14.310]that you want to be able to discuss
[00:33:15.920]within the Central browser.
[00:33:18.300]And so you might only want to discuss
[00:33:20.550]in the Central browser, your model
[00:33:22.320]and or your visions on a few surfaces,
[00:33:25.350]and so you don’t have to constantly upload the entirety
[00:33:28.330]of the project,
[00:33:29.230]you can just upload the objects
[00:33:31.050]that you want to be able to access and discuss
[00:33:33.010]within the Central browser.
[00:33:36.210]Here, for example, if I just wanted to upload my typography,
[00:33:40.100]my drill hole data, my borehole data,
[00:33:43.070]and maybe a geologic model and some designs
[00:33:46.630]you can do so here.
[00:33:50.240]The next step in the publishing phase of a project
[00:33:54.170]is to designate a project workflow stage.
[00:33:57.750]So here, you can see we’ve added
[00:33:59.810]several different project stages,
[00:34:01.850]whether it’s experimental, a peer review,
[00:34:04.700]you can assign this here upon uploading the latest revisions
[00:34:08.140]of the model.
[00:34:09.890]You can also include the entirety of the Leapfrog project,
[00:34:13.680]this is often going to be required
[00:34:15.250]when you’re first uploading the model,
[00:34:17.620]but after you have uploaded multiple versions of the model,
[00:34:20.490]you might not want to upload the entirety of the model
[00:34:23.270]and just the objects in question.
[00:34:25.760]And so you can actually select to do this here.
[00:34:28.640]And if I press, no,
[00:34:31.180]you don’t actually have to upload the entirety
[00:34:33.330]of the project when working remotely and or from home.
[00:34:36.920]If you’re worried about bandwidth,
[00:34:39.480]this is something that you might want to keep aware
[00:34:42.090]that you might not want to upload the entirety
[00:34:44.430]of the works project,
[00:34:45.510]and so you have control over doing so here.
[00:34:50.220]You can also control whether this is the complete process
[00:34:53.670]to object, the complete project
[00:34:55.710]with all stored modeling calculations is then published,
[00:34:58.720]other Central users will be able to download the project
[00:35:01.430]and work on it in Leapfrog Works,
[00:35:03.900]or you can leave this as in processed.
[00:35:06.590]And this is just something to keep in mind,
[00:35:09.550]all stored modeling calculations are removed
[00:35:11.810]before the project is uploaded,
[00:35:13.470]which can reduce the size of the project substantially.
[00:35:16.350]When the project is downloaded again,
[00:35:17.930]the project will need to be reprocessed
[00:35:20.250]depending on the size of the project,
[00:35:21.480]so this may take some time,
[00:35:22.830]so just something to keep in mind.
[00:35:25.090]A lot of the times, I personally don’t include the entirety
[00:35:27.870]of the Leapfrog project and just the edits and revisions
[00:35:31.490]that I’ve made or selected in the previous window.
[00:35:35.990]You can then select next,
[00:35:38.490]and here is where you designate a workflow stage.
[00:35:42.620]So you might’ve seen this graph that pops out
[00:35:46.040]on the project history tab.
[00:35:48.150]This is where you can actually branch out
[00:35:50.240]and or make some experimental stages in the model,
[00:35:54.140]or you can work laterally.
[00:35:56.010]You might have a few different specialized folks
[00:35:58.720]who are working on the same model,
[00:36:00.140]for example, a geophysicist and a structural geologist.
[00:36:03.370]The geophysicists might be working strictly
[00:36:05.460]on the numeric modeling of some resistivity data
[00:36:08.960]while your structural geologists
[00:36:10.600]might be working strictly on the geologic modeling section.
[00:36:14.890]And so you can actually break these off and work laterally.
[00:36:18.780]This can save a ton of time
[00:36:20.190]and enhances the specialization of your colleagues.
[00:36:24.290]This allows your colleagues to work independently
[00:36:27.950]on their own branch of the project,
[00:36:30.140]which can be always opened and or revised
[00:36:33.310]by anyone who is included in that Central project.
[00:36:38.210]You can also add some comments here.
[00:36:40.600]If I move this little window,
[00:36:42.420]you can see that my colleagues have added some comments
[00:36:44.970]regarding what they might’ve updated,
[00:36:47.180]this is just a nice way to track changes through time,
[00:36:50.370]and is a good way to track
[00:36:52.410]why you might have actually published a new version
[00:36:55.390]of this model.
[00:36:58.580]So I’m going to go ahead and cancel out of this,
[00:37:02.030]or why not, let’s, let’s publish it.
[00:37:10.530]This will then be published.
[00:37:12.870]And once you have published this to the Central Server,
[00:37:17.400]your colleagues will then have access via the browser
[00:37:21.500]and or via works to access the latest version of the model
[00:37:25.660]with your changes on that.
[00:37:27.510]A much easier way to exchange projects and edits,
[00:37:32.280]as opposed to potentially using what you might have,
[00:37:36.160]the previous methods as, you know,
[00:37:37.730]saving a zip copy is a very common method that I see users
[00:37:42.030]without Central using.
[00:37:45.180]You can now access the latest version of this publish event
[00:37:48.200]within the browser or here directly within works.
[00:37:53.270]Just a brief summary of some of the different features
[00:37:57.240]and tools we have just discussed,
[00:38:00.460]one of the things that I want to really elaborate on
[00:38:04.100]is how Central allows and enhances collaboration
[00:38:08.020]and version control among teams.
[00:38:10.820]Of course, when you’re working on your projects together,
[00:38:13.820]you want to be able to make a decision together.
[00:38:15.980]So we want to keep colleagues and clients informed
[00:38:19.310]throughout the project life cycle.
[00:38:22.140]Having your clients and colleagues
[00:38:23.780]on a mutual Central server
[00:38:25.960]really enables this collaboration.
[00:38:28.570]And it actually is a great tool for just keeping track
[00:38:32.650]of your changes in all the projects
[00:38:34.900]that might be working on.
[00:38:36.770]Organization is key to a successful project,
[00:38:39.760]and we want to help keep you organized
[00:38:41.750]while being able to collaborate and communicate
[00:38:44.700]throughout the project life cycle.
[00:38:49.900]As you have seen via the project graph
[00:38:52.380]and the project history tab,
[00:38:54.450]this Central allows collaboration
[00:38:57.080]and version control by testing ideas
[00:38:59.940]and allowing for peer revisions.
[00:39:02.840]Whether you are actually going in and making edits
[00:39:06.070]to the model directly,
[00:39:07.690]whether this is an experimental or pure viewing branch,
[00:39:10.840]which you can branch off from the direct project,
[00:39:13.530]or if you’re just adding comments and annotations
[00:39:16.100]within the browsers,
[00:39:17.750]you can collaborate with multiple different individuals
[00:39:20.940]on all levels and get their input and or edits
[00:39:26.230]and incorporate that into future models and revisions.
[00:39:34.600]I mentioned a lateral workflows,
[00:39:37.440]so you might have different station locations or regions,
[00:39:41.370]and or you might also have different individuals
[00:39:44.530]who are specialized,
[00:39:46.120]for example, geophysicists and structural geologists.
[00:39:49.720]And this allows them to use their expertise
[00:39:52.900]in their own branch of the model,
[00:39:54.957]and really organize your model accordingly.
[00:39:58.190]So really good way to document the changes
[00:40:01.440]and allow for visibility between maybe neighboring projects
[00:40:04.860]if you’re basing this on station location
[00:40:07.330]and or specialization
[00:40:09.990]if that is incorporated into the project.
[00:40:18.010]Of course, data sharing is one of the keys of Central,
[00:40:21.690]and so enabling cross collaboration is very important.
[00:40:26.760]You might be starting with a conceptual basic model
[00:40:30.090]and you might be breaking that up
[00:40:31.670]and or editing that through time
[00:40:33.900]with multiple different individuals.
[00:40:36.080]Somebody might be designing the 3D water body
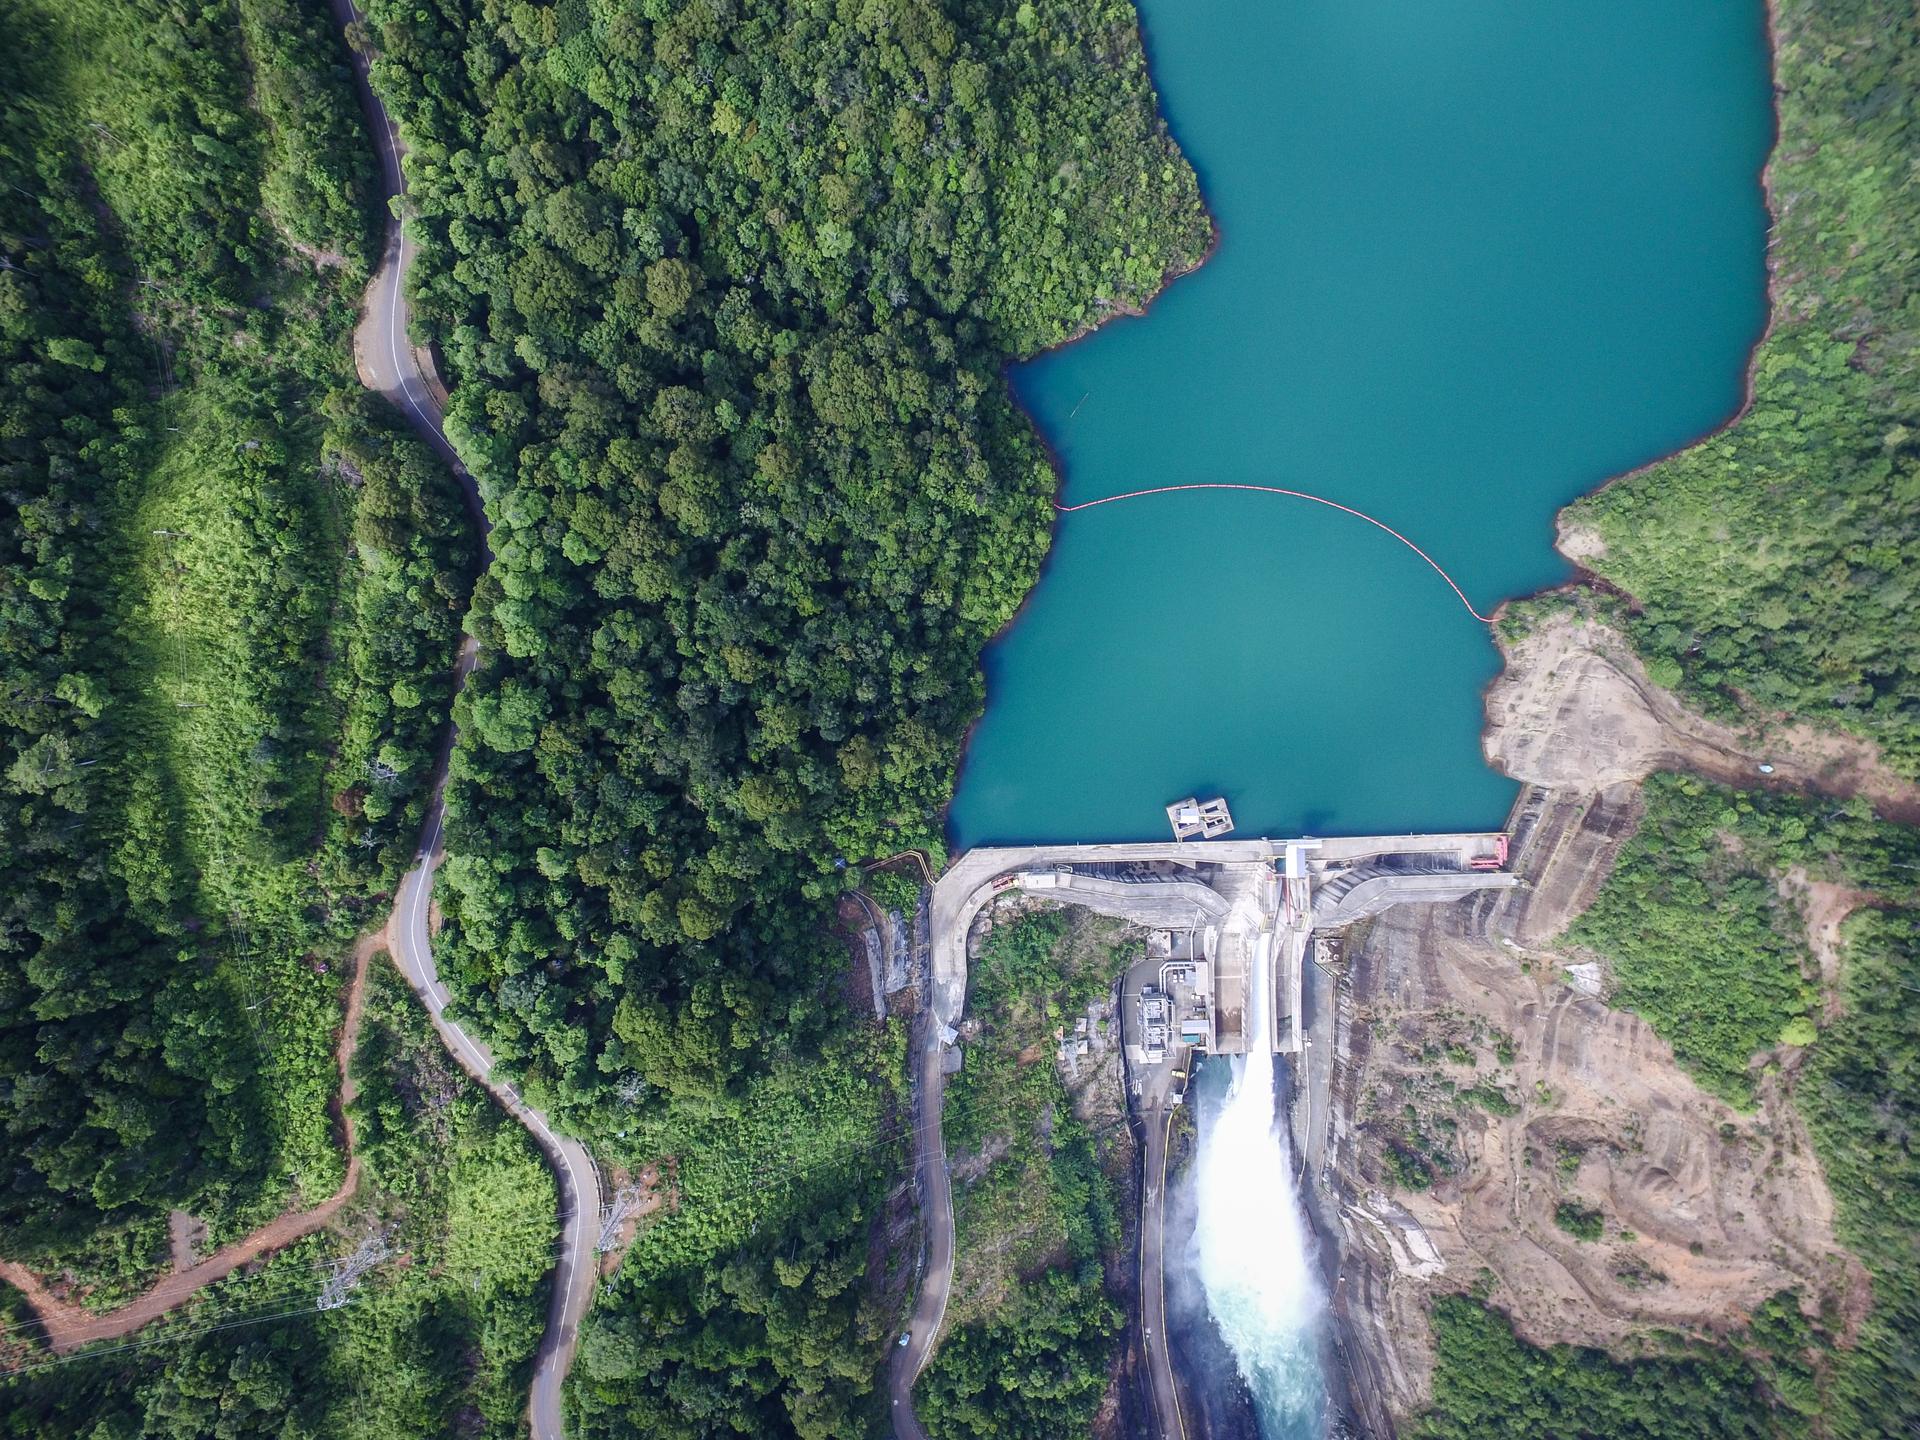
[00:40:38.820]as seen in this photo example,
[00:40:40.940]and somebody might be running a flow model
[00:40:43.830]and or creating a contaminant model.
[00:40:46.270]And this allows different individuals on the same project,
[00:40:49.610]in the same space to collaborate and communicate
[00:40:52.540]those changes and or explain why they’re doing so
[00:40:56.800]in a way that can be tracked and audited.
[00:41:04.020]One of the things that I want to mention now
[00:41:05.980]just to give you a little sneak peek is of course,
[00:41:09.100]Central is a collaboration and communication tool
[00:41:12.490]that allows auditability and individuals to track changes
[00:41:16.270]on their projects through times.
[00:41:18.440]Notifications are one of the new and upcoming features
[00:41:22.100]in Central which we’ll be releasing in April or may of 2020.
[00:41:25.940]Notifications allow you to understand
[00:41:27.830]what is happening in Central in real time.
[00:41:30.170]You will get notified when projects are shared with you,
[00:41:32.610]or when your permissions on a project change,
[00:41:35.190]you will also get notifications when annotations
[00:41:38.350]or other objects within the Central project are updated.
[00:41:42.200]And we want to be able to keep you up to date
[00:41:44.270]with the latest events and keep you notified
[00:41:46.930]as this is what Central was designed for.
[00:41:49.900]Of course, you can manage your preferences
[00:41:52.270]just like you would in your email preferences
[00:41:54.920]and subscribe to what is important to you
[00:41:56.980]and unsubscribed from what you might not want
[00:41:59.650]to get constant notifications for.
[00:42:01.410]So you do have full control over these notifications.
[00:42:04.810]Of course, we don’t want to be spamming you,
[00:42:06.310]and we want you to be able to have that visibility
[00:42:10.060]into the latest updates to the model
[00:42:12.720]without having to go back in
[00:42:14.520]and check on those individually.
[00:42:17.530]So just a cool little feature that is upcoming
[00:42:20.040]and I wanted to keep you aware of.
[00:42:24.230]And so, we definitely want you to try out Central.
[00:42:27.030]Currently, we have 60-day Central free of charge,
[00:42:31.200]and if you have any questions or interested,
[00:42:33.660]please reach out to your personal account manager.
[00:42:36.500]If you are not aware
[00:42:37.440]of who your personal account manager is,
[00:42:38.980]just contact our local sales representatives
[00:42:41.270]at [email protected],
[00:42:44.510]and we will deal with this accordingly.
[00:42:47.350]If you have any questions on the workflow
[00:42:50.770]and or technical support questions,
[00:42:52.470]don’t hesitate to reach out to our support team
[00:42:54.560]at [email protected],
[00:42:57.500]and we would be happy to help.
[00:43:00.000]For any other queries or more details,
[00:43:02.240]please visit our website at sequent.com
[00:43:05.060]and you can find a ton of information
[00:43:06.590]about the latest releases and other details on Central.
[00:43:11.940]So thank you so much for joining this
[00:43:15.000]and don’t hesitate to reach out,
[00:43:17.410]we would be happy to help
[00:43:18.500]and discuss Central in more detail.
[00:43:22.660]And on behalf of Seequent,
[00:43:24.350]thank you for joining the webinar today.
[00:43:27.350]We really appreciate you,
[00:43:29.010]and we want to be able to enhance your workflows
[00:43:31.240]while you’re working remotely,
[00:43:32.940]and we think that Central is the perfect solution to do so.
[00:43:36.520]And so if there’s anything you have any questions on,
[00:43:38.810]once again, don’t hesitate to reach out,
[00:43:40.820]and all the best from our team to you.
[00:43:43.690]Thank you so much and have a wonderful day.