


Bring your project to life in 3D and obtain volumes for your excavation.
Leapfrog has the tools to support you whether you are trying to visualise an existing excavation, or determine material volumes for a planned excavation.
In this How-To article, we’ll introduce you to the tools in Leapfrog that help you create an excavation model. Then we’ll go through the basic workflow to generate the excavation volume estimates.
Leapfrog’s Excavation Modeling Tools:
Merge Meshes 2D
The latest release of Seequent’s Leapfrog software, among other features, introduced the 2D Mesh Merging feature. 2D Mesh Merging is available across all Leapfrog products including Leapfrog Geo 5.0, Leapfrog Works 3.0 and Leapfrog Geothermal 4.0.
Mesh operations have been expanded to allow merging of meshes with a height-based interpolation. 2D Mesh Merging provides the ability to easily combine open meshes. This new mesh operation is ideal for joining topographical surfaces together, for example, a pit design or detailed surveyed pit pickup into a pre-mining topographic surface. It could also be used for infrastructure corridors or staging building excavations. More information on utilising this tool can be found here.
Combined Models Folder
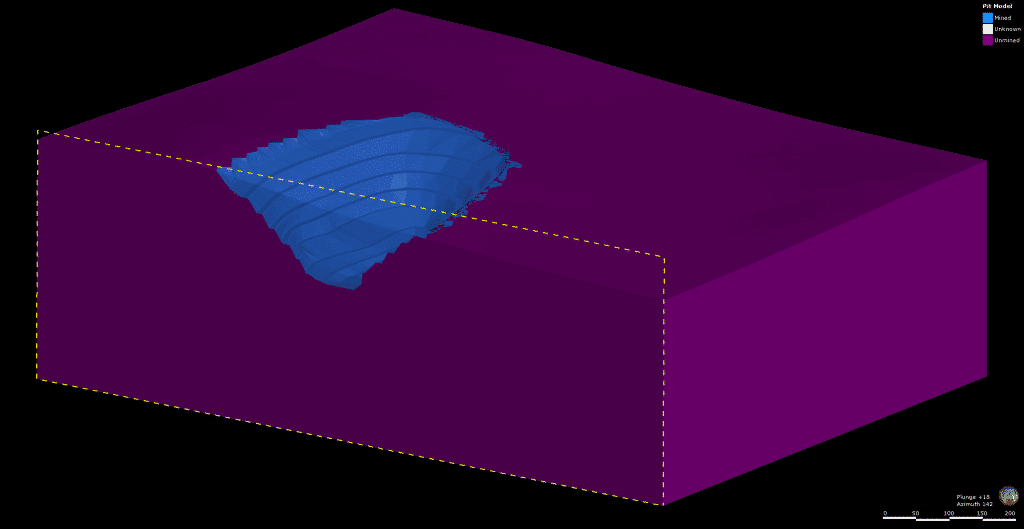
A combined model uses information from up to four geological models, interpolants and distance functions in order to visualise relationships between different types of data in the project. For this case, you will want to combine an existing geological model with an ‘excavation model’ to see what lithologies and subsequent volumes are occurring above / below the excavation surface. Check out our help guide for Combined Models here.
Basic Excavation Model Workflow
What you’ll need:
- A pre and post excavation surface. Typically this will be your topography surface and an excavation design surface.
- A geological model of the subsurface parameters of interest, or the data to build the model – Typically this will be the lithology. If you don’t already have the geological model, then find more on creating geological models here.
1. Data Preparation:
- Utilise the ‘Merge Mesh 2D’ function to merge your excavation surface or design with your existing topography. Please see section above or let us know if you have any questions on this tool. Note, you will want to leave the topography as the pre-excavation surface.
2. Build Two Geologic Models:
- Create a typical lithology based geologic model in Leapfrog, using the pre-excavation surface as the topography.
- Create a second geologic model (I.e. named excavation model) designating the base lithology column as ‘none’ while choosing the same boundary as the existing model.
- In the lithologies tab of the ‘excavation model’, add two new lithologies for excavated volume and remaining volume.
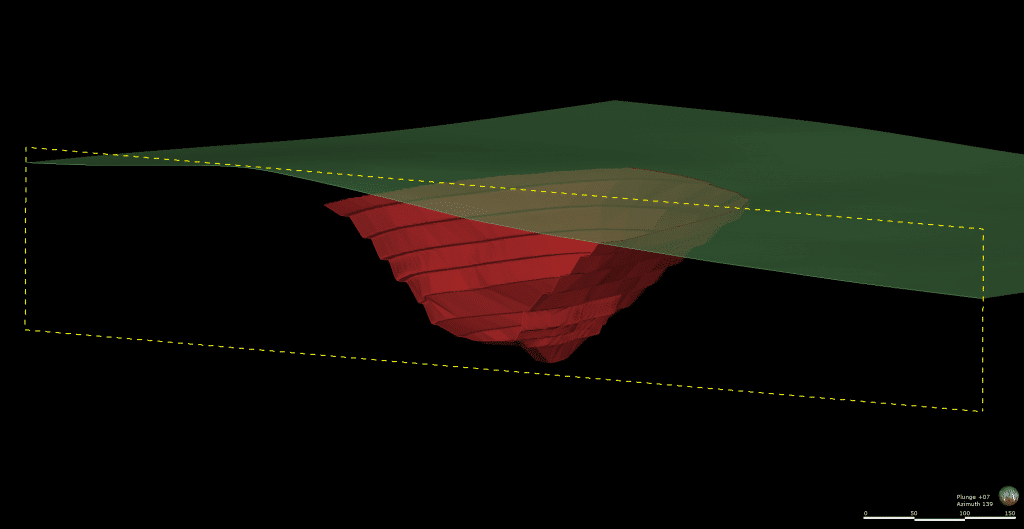
- Build a single erosional surface in the surface chronology, using the merged mesh of the topography and excavation design, designating the younger lithology as excavated volume and the older as remaining volume and then ‘activate’ the surface.
Check out our help guide for Geologic Models here
3. Combine the Models:
- Right-click on the ‘Combined Models’ folder in the project tree and create a new combined model.
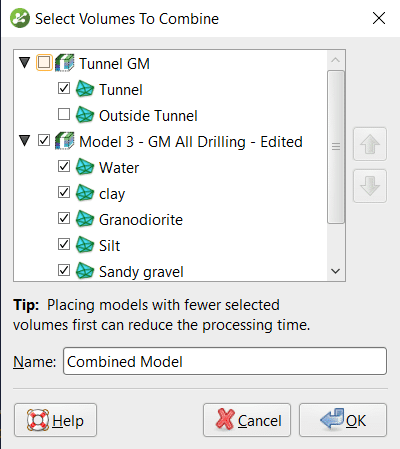
- Select the models that you want to use in the combined model, in this case we will be using the two geological models as outlined in Step 2 above, our lithology model and excavation model.
- Select the output volumes that you want to combine from each selected model. We also recommend having the model order with the excavation model first. Name the model and select ‘OK’.
- You now have a combined model of your excavation and existing geologic model! This can tell you volumes of your excavated material and help you visualise your project.
This example of how to use these tools are just to get you started. Have you used the combined model folder before? Have you created an excavation model in Leapfrog? We always like to hear from you, so please feel free to get in touch with the team at [email protected].