


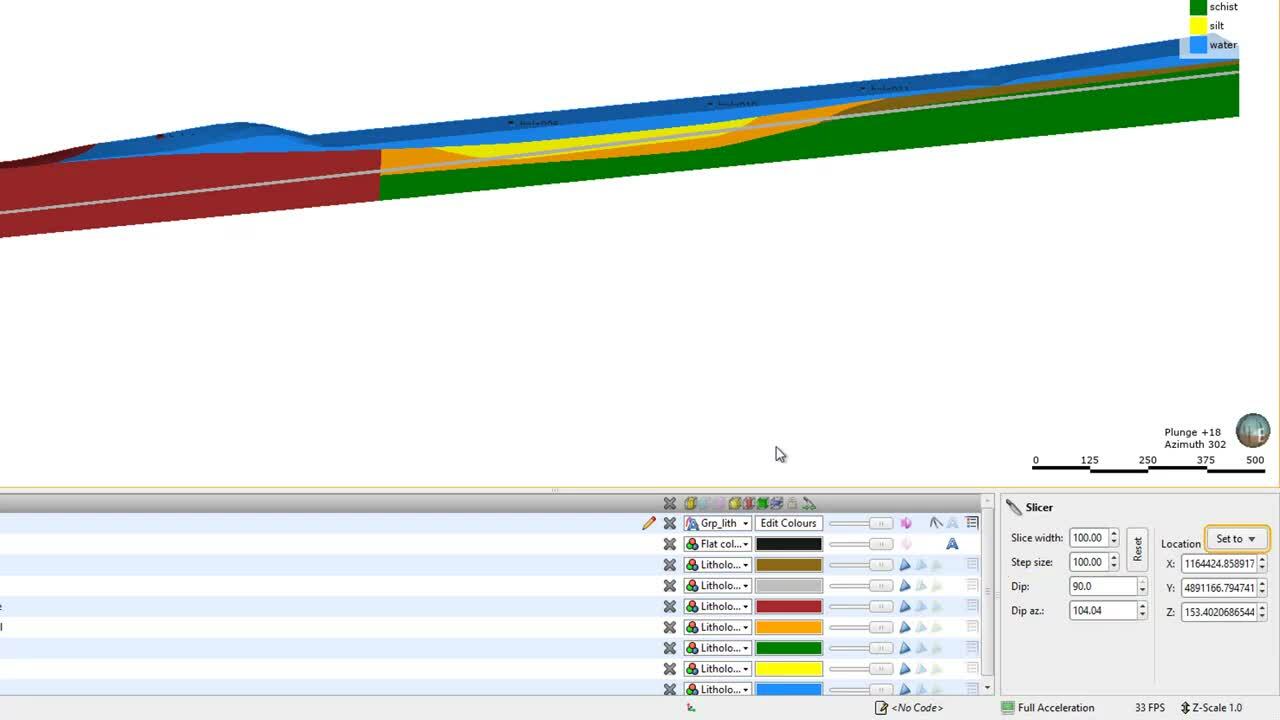
While modeling in Leapfrog is designed to be done in 3D space directly from the borehole data, it is frequently useful to review your data and your model in 2D. This can be done using the slicer tool in Leapfrog.
Please note: In late 2020, Leapfrog Works received a significant update to its user interface. While the current version of Leapfrog looks quite different from the version used to record this video, most of this content is still valid as the layout, location of functions, and workflows remain largely the same. For more information about the latest new features, please see the Leapfrog Works product page (https://my.seequent.com/products/leapfrog-works/latest).
0:00 – Introduction to the slicer
0:24 – Drawing a slice
0:45 – Interacting with the slicer
0:54 – Slicer viewing options (shapes list)
1:32 – Slice width and step size options (properties panel)
2:21 – Viewing the slice in the scene
2:32 – Moving through slices in the scene
3:12 – Slice mode options for different objects in the scene
3:46 – Options for visualising your boreholes and volumes together on a slice
4:05 – Bulk action for objects in shapes list
4:14 – Fill slicer option
4:20 – View a true 2D slice
5:00 – Toggle slicer on and off
Duration
5 min
See more on demand videos
VideosFind out more about Leapfrog Works
Learn moreVideo Transcript
The video transcript gets copy and pasted here