


In this video we will introduce the Refine Model tool to further define lithological volumes within your geological model.
Duration
4 min
See more on demand videos
VideosFind out more about Seequent's mining solution
Learn moreVideo Transcript
[00:00:10.730]<v ->Welcome to this quick tutorial on using</v>
[00:00:13.150]the Refined Model tool to hone your lithological surfaces.
[00:00:17.500]The Refined Model tool allows you to subdivide any volume
[00:00:21.060]from an existing geological model,
[00:00:23.330]using any column of data in your project.
[00:00:26.580]In this example, I have built a geological model
[00:00:29.360]using a simplified lithology interpretation,
[00:00:32.640]and with no lights model my basement miscellaneous unit,
[00:00:36.170]according to the detail originally logged.
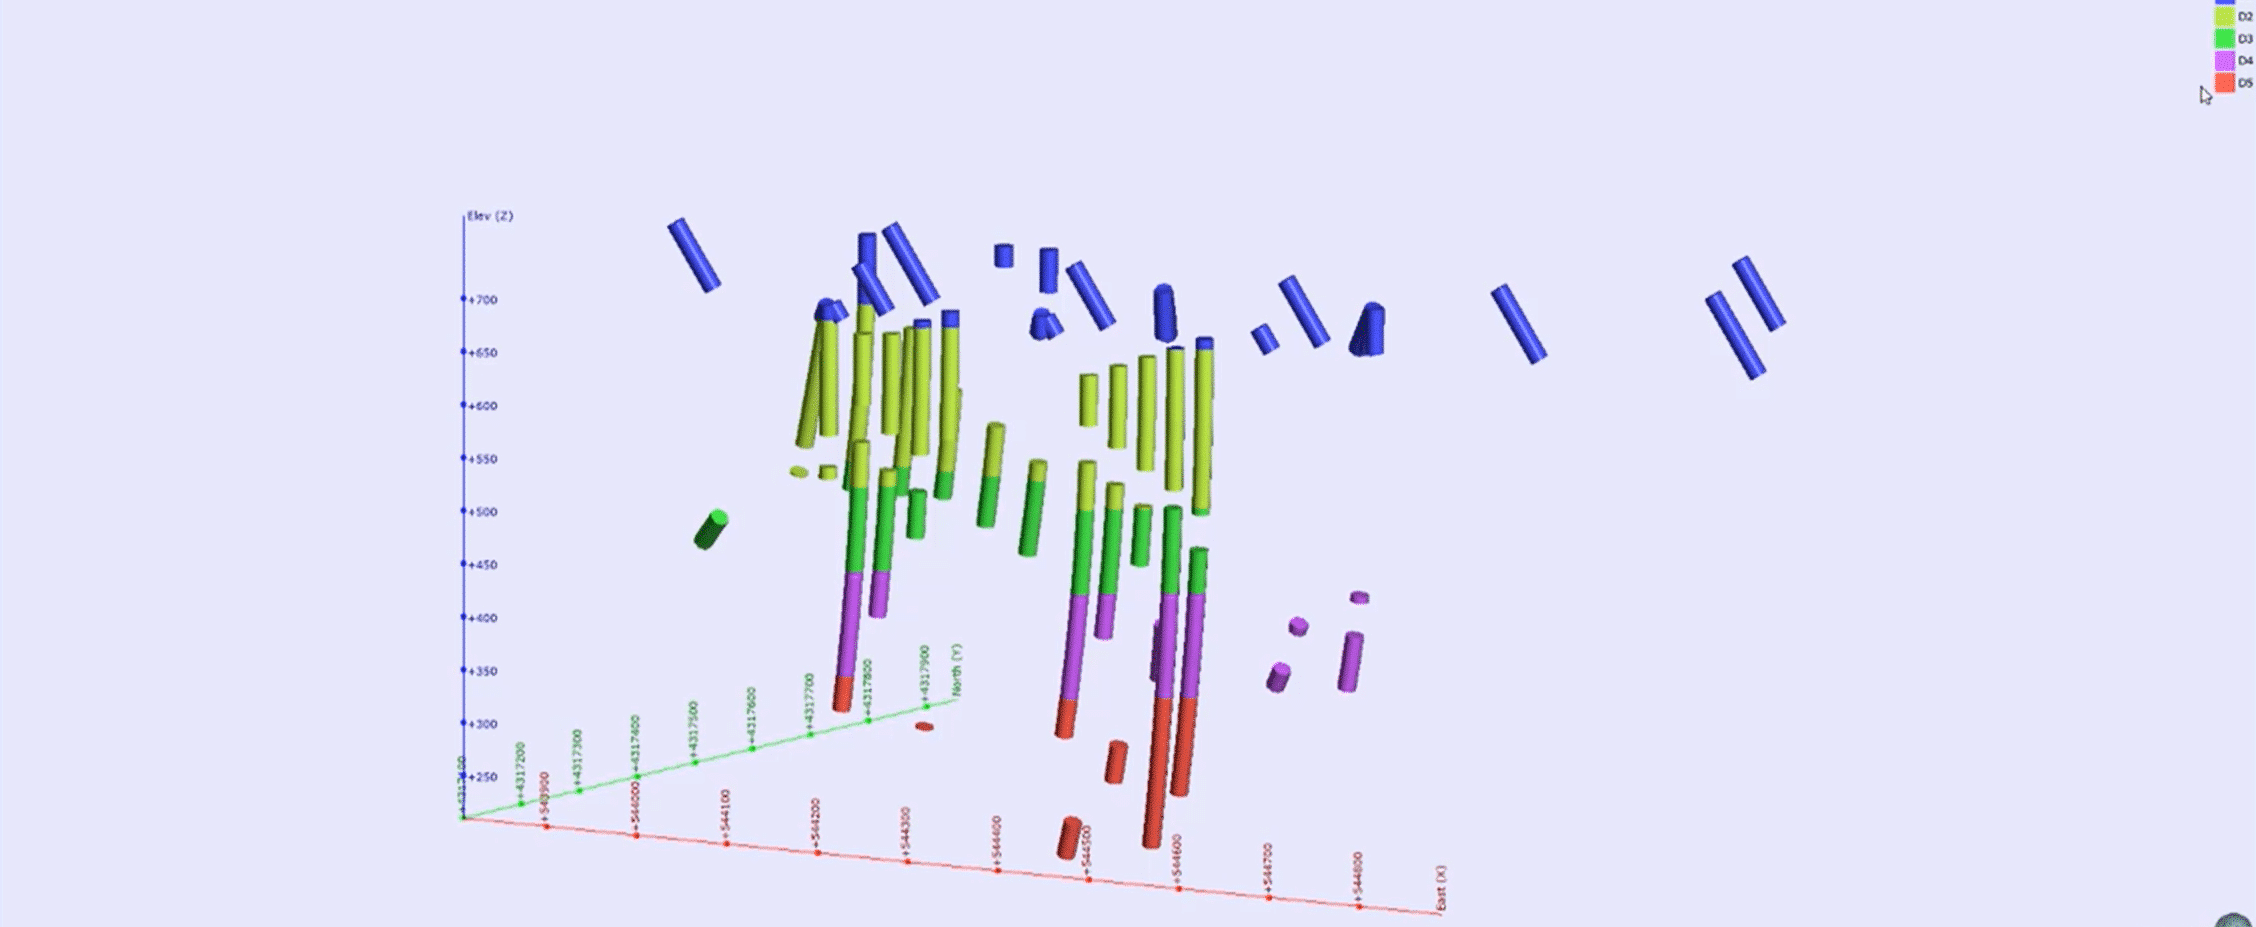
[00:00:46.760]In this case, my basement unit is actually defined
[00:00:49.960]by five separate stratigraphic units,
[00:00:52.730]so named D1 to D5.
[00:00:56.200]You can apply the same principle
[00:00:58.210]and methodology to define alteration sequences,
[00:01:01.520]distinct mineralization phases,
[00:01:03.510]or as a way of handling on Greek mythologies.
[00:01:07.340]To create a refined model,
[00:01:09.200]there must be a geological model existing
[00:01:12.110]in your Leapfrog Geo projects.
[00:01:14.350]Before starting, It’s a good idea to make a copy
[00:01:17.070]of your original geological model.
[00:01:19.540]Given that refined models were reorganize
[00:01:21.810]and set in situ under the original model object.
[00:01:27.890]Let’s begin, by right clicking the geological model folder,
[00:01:32.270]selecting new refined model,
[00:01:37.030]select the model and the lithology unit
[00:01:40.000]you would like to refine further,
[00:01:42.570]and appropriate base lithology column,
[00:01:44.810]in this case stretch represents my original
[00:01:47.420]unsimplified lithology,
[00:01:49.487]and finally give an appropriate resolution a name
[00:01:53.200]before clicking okay.
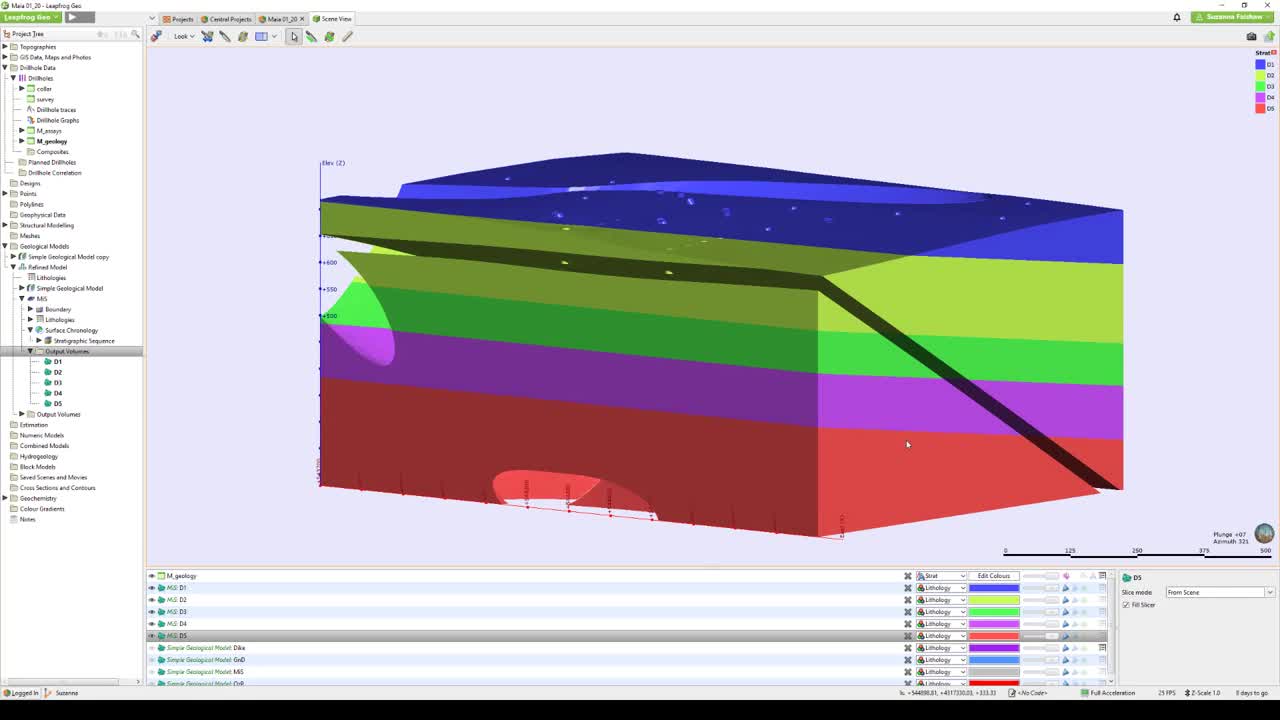
[00:01:57.700]Under the project tree,
[00:01:58.940]we can see a new refined model has been created,
[00:02:02.550]and the entire original parent geological model
[00:02:05.910]moved underneath it.
[00:02:09.690]The sub model representing the refined basement unit
[00:02:13.670]is created with its own sets of object fields,
[00:02:16.470]including boundary lithology, surface chronology,
[00:02:19.680]and output volumes.
[00:02:22.600]From the basement sub model,
[00:02:24.090]we can now go build our surfaces for our refined model,
[00:02:27.500]in the same way as our normal geological model.
[00:02:35.960]Once activated and processed,
[00:02:38.170]we can go look at the sub model output volume separately,
[00:02:44.370]or as a whole model.
[00:02:49.600]You can create additional sub models by right clicking
[00:02:52.710]on the top refined model object,
[00:02:54.980]selecting refined lithology and repeating previous steps
[00:02:59.013]for any additional units you wish to refine.
[00:03:05.030]Thank you for watching this quick video.
[00:03:07.750]To see how you can use refined model to report resources,
[00:03:11.160]where you have overlapping reporting volumes,
[00:03:14.130]then please check out our additional bite-size video
[00:03:16.890]available on the secret website.