In this blog, we will cover the workflow steps to report grades and tonnes of stopes in an underground mine.
In Leapfrog Edge, the Resource Report is a pivot table for reporting on resources and reserves in accordance with standards, with the freedom to customise the table to the unique needs of the project requirements. A Resource Report can display multiple categories and multiple numeric columns. Resource Reports in Leapfrog Edge are dynamic so are up to date and available as soon as your block model is updated.
Build meshes into a Geological Model (GM)
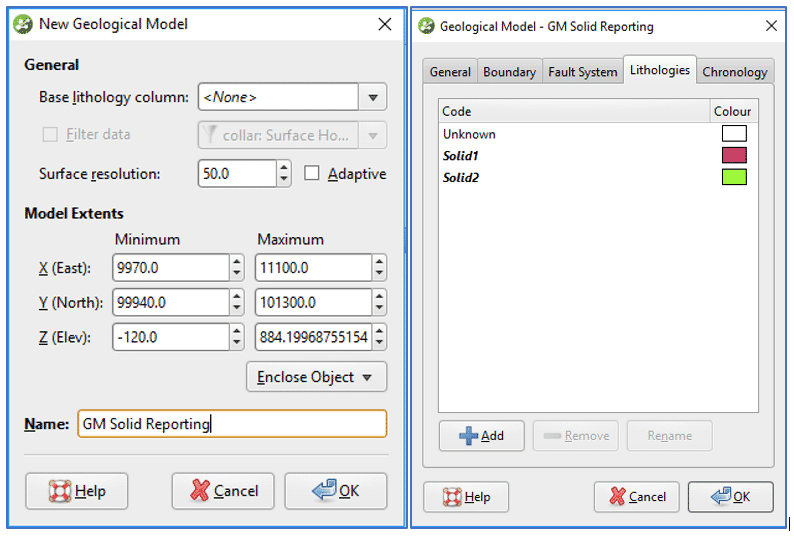
First, import reporting solids into the meshes folder. Create a new GM with Base Lithology column set to <None>.
In the Lithologies Tab, add a new name for each solid (e.g. stope names).
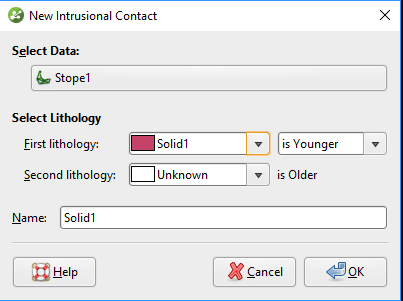
For each mesh add to the GM via the following steps:
Select Surface Chronology > New Intrusion > From Surface
(Select the mesh and assign name in the First lithology dropdown)
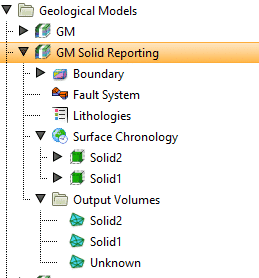
Finally, activate the surfaces to create the output volumes.
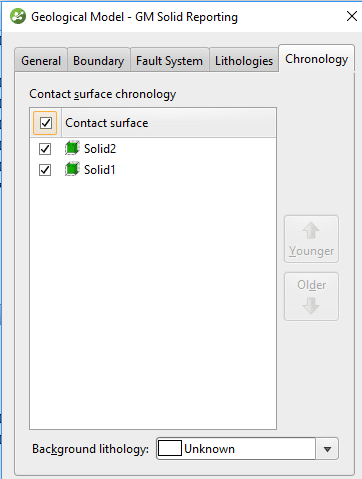
The final output volumes for the GM, will be the solids you are wanting to report on.
Evaluate onto the Block Model
Once the GM has been created, evaluate this information onto the block or sub-blocked model.
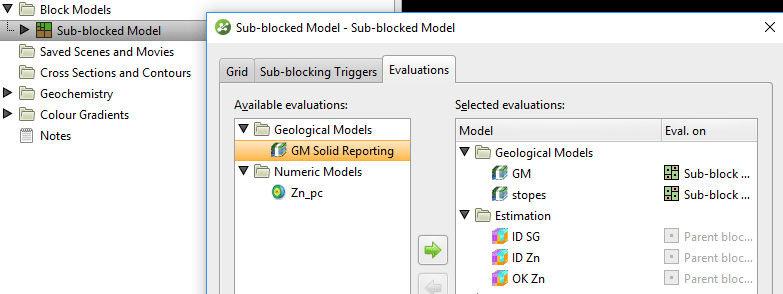
To do so, right-click on your block model in the Block Models folder and select Evaluations.
From the list of available evaluations, select your GM Solid Reporting model and using the green arrow, move it to the selected evaluations column. Then click OK.
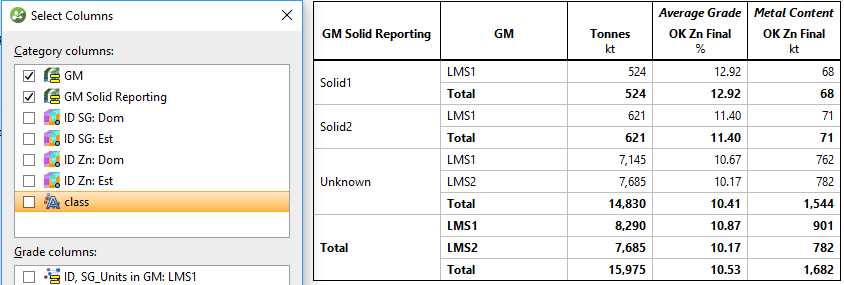
You can now report on these solids using either the statistics or resource reporting tools.
Finally, we can create a Resource Report (Right click on block model > New Resource Report) or open an existing Resource Report. In the top left-hand corner, click Select Columns. Your GM Solid reporting model will be available to select under the Category columns list. The grade and tonnes will now display in the resource report table. You can further customise your resource report to include volume and density.
Validate Results Visually
You can validate the estimate on a stope by stope basis visually in the 3D scene using filters and the ‘Interrogate Estimator’ function.
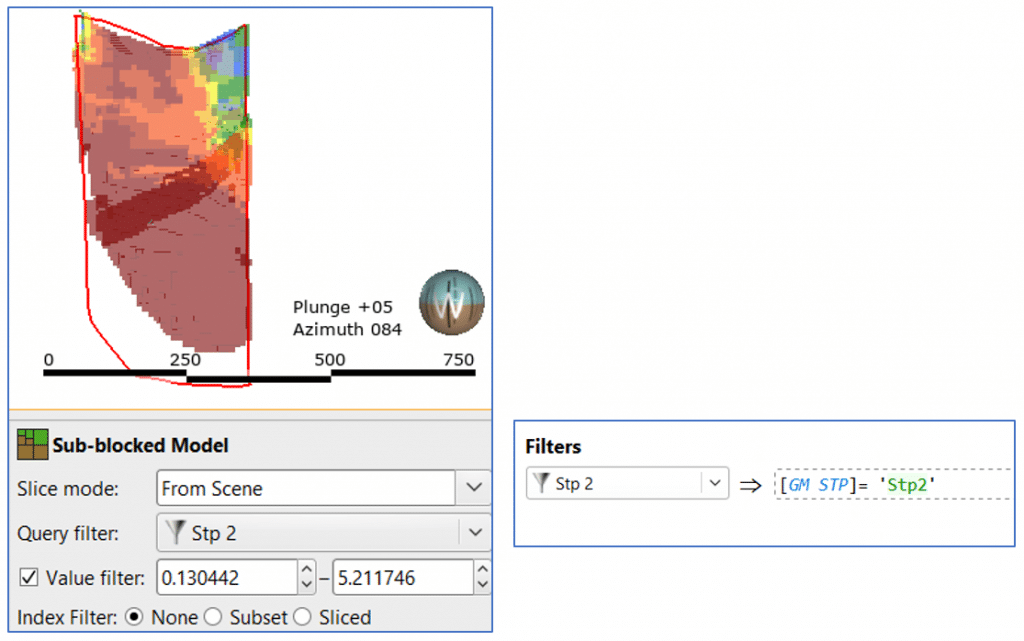
Filters
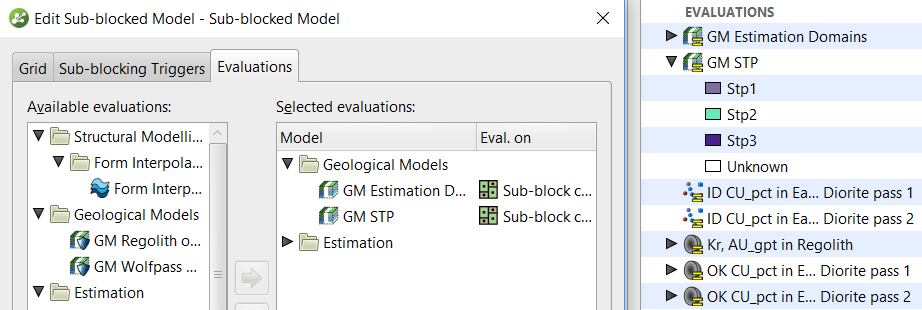
A filter on the block model is equivalent to a query filter elsewhere in Leapfrog Geo. It is created within the block model. Sub-blocked Model (right click) > Calculations and Filters; Select New Item > Filter. It is important that any geological model volumes you wish to use within a filter are first evaluated to the block model.
The filter is applied via the properties panel in the Scene view. An additional filter on the values of the item displayed can be applied on top of any defined query filter.
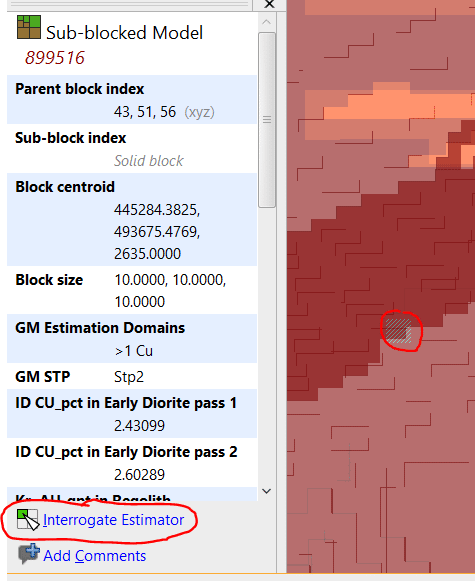
Interrogate Estimator
The Interrogate estimator function can be accessed directly via the 3D scene (select block of interest > Interrogate Estimator from block details panel) or by right clicking on the block model in the project tree.
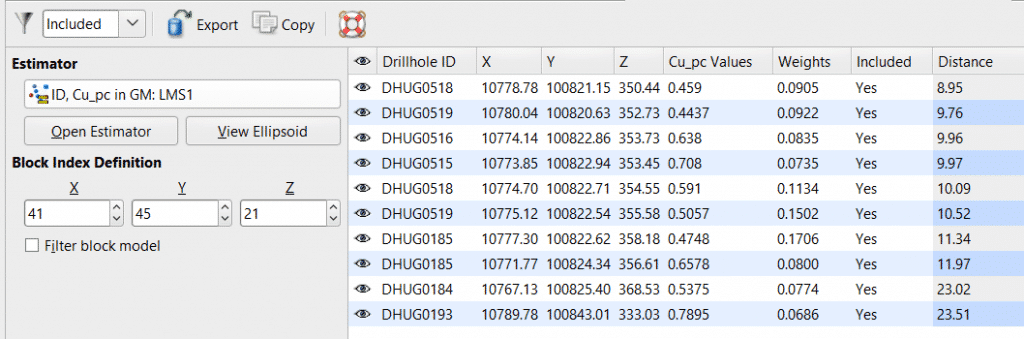
The ‘Interrogate Estimator’ shows you useful information including samples selected, their distance from the block centroid and the kriging weights. Edits can be made to the Estimator directly and the table will update dynamically. This helps investigate issues such as unexpected high-grade blocks or the presence of negative kriging weights in the estimate.